
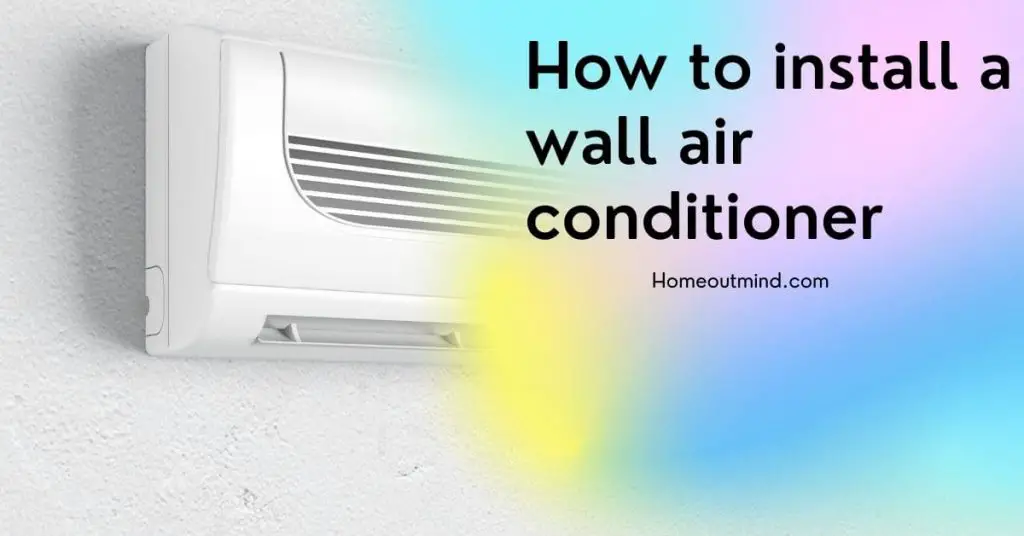
Are you finding it difficult and also you don’t know how to install a wall air conditioner? and you see that if you call a professional it would cost you some huge cash to install an air conditioner condenser.
is not hard and it is not easy but when following these steps and instructions step-by-step at the end of this article you’ll know how to install a wall air conditioner by yourself, however, if you find it difficult call a qualified person earlier than getting into our subject how to install air conditioner you might know.
What is the equipment you need to install a wall air conditioner?
1. Mounting plate
2. Mounting plate fixing screw 3/16” × 1” (M4 × 25mm)
3. Titanium apatite photocatalytic air-purifying filter
4. Wireless remote controller
5. Remote controller holder
6. Fixing screw for distant controller holder 1/8” × 13/16” (M3 × 20mm)
7. Dry battery AAA. LR03 (alkaline)
8. Indoor unit fixing screw 3/16” × 1/2” (M4 × 12mm)
9. Tube
10. Operation guide
11. Installation handbook
12. Screw cowl
How to install a wall air conditioner step by step
Step1. Choosing an Installation Site
1. Indoor unit
The indoor unit needs to be sited in a spot the place.
1) the restrictions on setting up specified within the indoor unit set up drawings are met.
2) each air inlet and air outlet have clear paths met, 3) the unit shouldn’t be within the path of direct daylight
4) the unit is away from the supply of warmth or steam
5) there isn’t a supply of machine oil vapor (this will likely shorten indoor unit life)
6) cool (heat) air is circulated all through the room
7) the unit is away from digital ignition kind fluorescent lamps (inverter or fast begin kind) as they could shorten the distant controller vary
8) the unit is at the very least 3.5ft (1m) away from any tv or hi-fi (the unit could trigger interference with the image or sound)
9) set up on the advisable top of 6ft (1.8m)
10) no laundry tools are positioned within the house.
How to install air conditioner support bracket?
1) Install the wall hook bracket so that it’s accurately positioned horizontally and vertically. If the wall hook bracket is tiled, water will drop to the ground.
2) Install the wall hook bracket so that it’s sturdy sufficient to resist the load of a grownup.
● Fasten the wall hook bracket to the wall with 6 or extra screws by the holes close to the outer fringe of the bracket.
● Check that there isn’t a rattle on the wall hook bracket.
NOTE: Install the wall hook bracket horizontally and perpendicularly
2. Wireless distant controller
1) Turn on all of the fluorescent lamps within the room, if any, and discover the location of the place distant management indicators are correctly obtained by the indoor unit (inside 23ft/7m).
Step2. Preparation before Installation
1. Removal method
Hook fingers on the tabs on the left and proper of the primary physique, and open till the panel stops. Slide the entrance panel sideways to disengage the rotating shaft. Then pull the entrance panel towards you to take away it.
2. Installation method
Align the tabs of the entrance panel with the grooves, and push in. Then shut slowly. Push the middle of the decreased floor of the panel firmly to have to interact the tabs.
Step3. Removing and installing the front grille
1. Removal method
1) Remove the entrance panel to take away the air filter.
2) Remove 6 screws from the entrance grille.
3) In the entrance of the OOO mark of the entrance grille, there are Three higher hooks. Lightly pull the entrance grille towards you with one hand, and push down on the hooks with the fingers of your different hand.
Place each hand underneath the middle of the entrance grille, and while pushing up, pull it towards you.
2. Installation method
1) Install the entrance grille and firmly have interaction with the higher hooks
2) Install 6 screws on the entrance grille.
3) Install the air filter after which mount the entrance panel.
NOTE: Be certain to put on protecting gloves.
Step4. How to set the different addresses?
When 2 indoor models are put in a single room, the two wi-fi distant controllers could be set for various addresses.
1) Remove the metallic plate electrical wiring cowl. (Refer to the When connecting to an HA system.)
2) Cut the handle jumper (JA) on the printed circuit board.
3) Cut the handle jumper (JA) within the distant controller.
Step5. When connecting to an HA system?
(wired remote controller, central distant controller, and so forth.)
1) Remove the entrance grille. (6 screws)
2) Remove {the electrical} wiring field. (1 screw)
3) Remove the metallic plate electrical wiring cowl. (Four tabs)
4) Attach the connection wire to the S21 connector and pull the harness out by the notched half within the determine.
5) Replace {the electrical} wiring cowl because it was, and pull the harness round.
Step.6 Refrigerant Piping Work
1. Flaring the pipe finish
1) Cut the pipe finish with a pipe cutter.
2) Remove burrs with the minimum floor going through downward so that the chips don’t enter the pipe.
3) Put the flare nut on the pipe.
4) Flare the pipe.
5) Check that the flaring is correctly made.
2. Caution on piping handling
1) Protect the open finish of the pipe in opposition to mud and moisture.
2) All pipe bends must be as mild as doable. Use a pipe bender for bending.
3) Selection of copper and heat insulation materials
• When utilizing business copper pipes and fittings, observe the next: 1) Insulation materials: Polyethylene foam Heat switch fee: 0.041 to 0.052W/mK (0.024 to 0.030Btu/fth°F (0.035 to 0.045kcal/mh°C)) Be positive to make use of insulation that’s designed to be used with HVAC Systems.
Step7. install the mounting plate
• The mounting plate should be put in on a wall that can support the weight of the indoor unit.
1) Temporarily secure the mounting plate to the wall, be sure that the plate is the degree, and mark the boring factors on the wall.
2) Secure the mounting plate to the wall with screws.
Step8. Boring a wall gap and putting in wall embedded pipe
• For partitions containing steel frames or steel board, you should use a wall embedded pipe and wall cowl within the feed-through gap to forestall potential warmth, electrical shock, or fireplace.
• Be positive to caulk the gaps across the pipes with caulking materials to forestall water leakage.
1) Bore a feed-through gap of 3-1/Eight inch (80mm) within the wall so it has a downward slope towards the surface.
2) Insert a wall pipe into the opening.
3) Insert a wall cowl into the wall pipe.
4) After finishing refrigerant piping, wiring, and drain piping, caulk pipe gap hole with putty.
Step9. Laying piping, hoses, and wiring
1. Right-side, right-back, or right-bottom piping
1) Attach the drain hose to the underside of the refrigerant pipes with adhesive vinyl tape.
2) Wrap the refrigerant pipes and drain hose along with insulation tape.
3) Pass the drain hose and refrigerant pipes using the wall gap, then set the indoor unit on the mounting plate hooks through the use of (triangle icon) the markings on the high of the indoor unit as information.
2. Left-side, left-back, or left-bottom piping
1) Replace the drain plug and drain hose.
2) Attach the drain hose to the underside of the refrigerant pipes with adhesive vinyl tape.
3) Be positive to attach the drain hose to the drain port instead of a drain plug
4) Shape the refrigerant pipes alongside the pipe path marking on the mounting plate.
5) Pass drain hose and refrigerant pipes using the wall gap, then set the indoor unit on mounting plate hooks, utilizing the(triangle icon) markings on the high of the indoor unit as information.
6) Pull within the inter-unit wire.
7) Connect the inter-unit pipes.
8) Wrap the refrigerant pipes and drain hose along with insulation tape as the suitable determine, in case of setting the drain hose using the again of the indoor unit.
9) While exercising care so that the inter-unit wire doesn’t catch the indoor unit, press the underside fringe of the indoor unit with each hand till it’s firmly caught by the mounting plate hooks. Secure indoor unit to the mounting plate with indoor unit fixing screws 3/16 × half-inch (M4 × 12mm)
3. Wall embedded piping
• Insert the drain hose to this depth so it gained be pulled out of the drain pipe.
Step10. Wiring
1) As proven within the illustration on the right-hand aspect, insert the wires together with the bottom wire into the conduit and save them with a lock nut onto the conduit mounting plate.
2) Insert the wires together with the bottom wire into the tube.
3) Strip wire ends (9/16 inch (15mm)).
4) Match wire colors with terminal numbers on indoor and outside unit’s terminal blocks and firmly screw wires to the corresponding terminals.
5) Connect the bottom wires to the corresponding terminals.
6) Pull the wires and test that the wires are securely fastened to the terminal block.
7) In case of connecting to an adapter system, run the distant controller cable and connect the S21. (Refer to P5 when connecting to an HA system.)
8) Shape the wires so that the service lid matches securely, then shut the service lid.
Step11. Drain piping
1) Connect the drain hose, as described properly.
2) Remove the air filters and pour some water into the drain pan to test the water flows easily.
3) When the drain hose requires an extension, get hold of an extension hose commercially obtainable. Be certain to thermally insulate the indoor part of the extension hose.
4) When connecting an inflexible polyvinyl chloride pipe (nominal diameter 1/2 inch (13mm)) onto the drain hose connected to the indoor unit as with embedded piping work, use any commercially obtainable drain socket (nominal diameter 1/2 inch (13mm)) as a joint.
Step12. Trial operation
1) Measure the provision voltage and guarantee that it falls within the specified vary.
2) Trial operations ought to be carried out in both cooling and heating mode.
• In cooling mode, choose the bottom programmable temperature; in heating mode, choose the very best programmable temperature.
a) Trial operation could also be disabled in both modes relying on the room temperature. Use the distant controller for trial operation as described below.
b) After the trial operation is full, set the temperature to a standard stage (78°F to 82°F (26°C to 28°C) in cooling mode, 68°F to 75°F (20°C to 24°C) in heating mode).
c) For safety, the system disables restart operation for Three minutes after it’s turned off.
3) Carry out the check operation following the operation guide to make sure that all features and components, equivalent to fin motion, are working correctly.
• The air conditioner requires a small quantity of energy in its standby mode. If the system shouldn’t be for use for a while after setting up, shut off the circuit breaker to remove pointless energy consumption.
• If the circuit breaker journeys to close off the ability to the air conditioner, the system will restore the unique operation mode when the circuit breaker is opened once more.
| Trial operation from the distant controller |
| 1) Press the “ON/OFF” button to activate the system. 2) Press the “TEMP” button (2 places) and the “MODE” button at a similar time. 3) Press the “MODE” button twice. (“ T ” will seem on the show to point that trial operation mode is chosen.) 4) Trial operation terminates in approx. 30 minutes and switches into regular mode. To stop a trial operation, press the “ON/ OFF” button. |
Read also:
- How to install air conditioner condenser?
- How to remove air conditioner?
- How to replace air conditioner ducts?
- What is a split system air conditioner?
- What is an air handler on an air conditioner?
- Air conditioner capacitor what does it do?
- The ultimate guide to air conditioner troubleshooting
- How to clean air conditioner?
Step13. Test items
| Test objects | Symptom (diagnostic show on RC) |
| Indoor and doors models are put incorrectly on a strong basis. | Fall, vibration, noise |
| No refrigerant fuel leaks. | Incomplete cooling/heating perform |
| Refrigerant fuel and liquid pipes and indoor drain hose extension are thermally insulated. | Water leakage |
| The draining line is correctly put in. | Water leakage |
| The system is correctly grounded. | Electrical leakage |
| The specified wires are used for inter-unit wiring. | Inoperative or burn harm |
| Indoor or doors unit’s air inlet or air outlet has a transparent path of air. Stop valves are opened. | Incomplete cooling/heating perform |
| The indoor unit correctly receives distant management instructions. | Inoperative |
| The warmth pump or cooling-only mode is selectable with the DIP change of the distant controller. | Remote controller malfunctioning |
