
are you find tough and also you don’t know how to install air conditioner condenser, and also you see that in case you call a professional it might cost you a lot of money to put in an air conditioner condenser.
is not exhausting and it isn’t easy however when following these steps and instructions step-by-step on the finish of this text you may have a knowledgeable to install air conditioner condenser by your self, however, in case you find it troublesome call a qualified particular person sooner than getting into our topic find out how to install air conditioner condenser you may know.
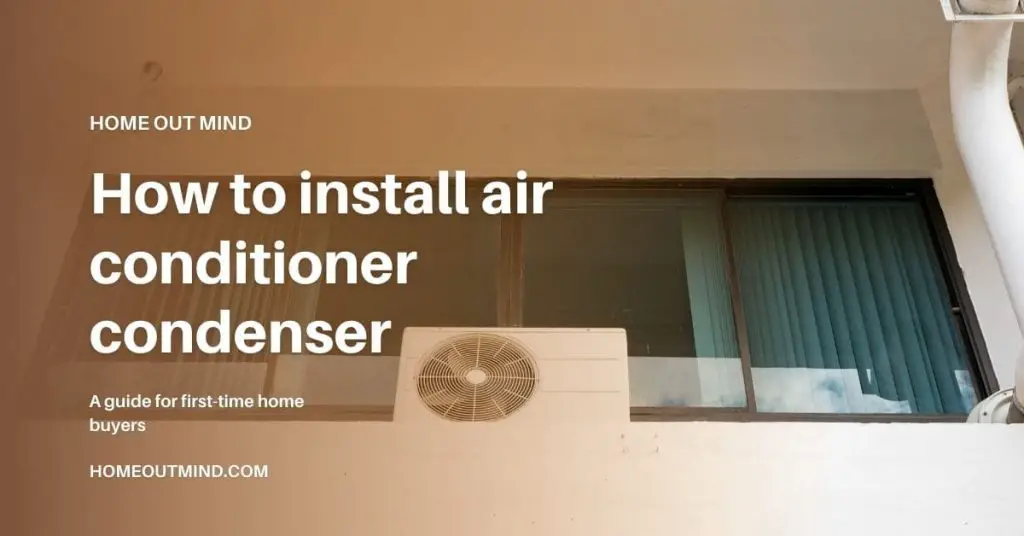
What is an air conditioner condenser?
A condenser (or AC condenser) is the outside portion of an air conditioner or warmth pump that both releases or collects warmth, relying on the time of the 12 months. … The compressor is the guts of the system because it compresses the refrigerant and pumps it to a coil within the type of hot gas.
Where should I place air conditioner condenser?
1) Choose a spot stable sufficient to bear the load and vibration of the unit, the place the operation noise won’t be amplified.
2) Choose a location the place the hot air is discharged from the unit or the operation noise won’t cause a nuisance to the neighbors of the user.
3) Avoid locations close to a bedroom and the like, so that the operation noise will cause no trouble.
4) There should be sufficient areas for carrying the unit into and out of the location.
5) There should be enough space for air passage and no obstructions across the air inlet and the air outlet.
6) The site should be free from the potential of flammable gas leakage in a close-by place.
7) Install items, power cords, and inter-unit cables no less than Three meters away from tv and radio units. This is to stop interference with photographs and sounds. (Noises could also be heard even when they’re greater than Three meters away relying on radio wave situations.)
8) In coastal areas or different locations with salty environments of sulfate fuel, corrosion might shorten the lifetime of the air conditioner.
9) Since drain flows out of the outside unit, don’t place below the unit something which should be refrained from moisture.
Note: Cannot be put in hanging from the ceiling or stacked.
Precautions on Installation
• Check the power and stage of the setup floor so that the unit won’t trigger any working vibration or noise after being put in.
• Following the inspiration drawing, repair the unit securely by way of the inspiration bolts. (Prepare 4 units of M8 or M10 basis bolts, nuts, and washers every which can be found on the market.)
• It is greatest to screw within the basis bolts till their size is 20mm from the inspiration floor.
How to install air conditioner condenser step by step
Step1. Flaring the pipe finish.
1) Cut the pipe finish with a pipe cutter.
2) Remove burrs with the minimum floor going through downward so that the chips don’t enter the pipe.
3) Put the flare nut on the pipe.
4) Flare the pipe.
5) Check that the flaring is correctly made.
Notes:
1) Do not use mineral oil on flared half.
2) Prevent mineral oil from entering into the system as this would cut back the lifetime of the items.
3) Never use piping that has been used for earlier installations. Only use components that are delivered with the unit.
4) Do by no means set up a drier to this R410A unit to be able to assure its lifetime.
5) The drying materials might dissolve and injury the system. 6) Incomplete flaring might cause refrigerant gas leakage.
Step2. Refrigerant piping
Align the facilities of each flare and tighten the flare nuts Three or Four turns by hand. Then tighten them totally with the torque wrenches.
| Flare nut tightening torque | ||
| Gas side | Liquid side | |
| 15,18 class | 24 class | – |
| 1/2 inch (12.7mm) | 45.6-55.6ft • lbf (61.8-75.4N • m) | 1/4 inch (6.4mm) |
| 36.5-44.5ft • lbf (49.5-60.3N • m) | 45.6-55.6ft • lbf (61.8-75.4N | 10.4-12.7ft • lbf (14.2-17.2N |
Step3. Purging air and checking gas leakage.
• When piping work is accomplished, it’s essential to purge the air and test for gasoline leakage.
1) Connect the projection aspect of the charging hose (which comes from the gauge manifold) to the gasoline cease valve’s service port.
2) Fully open gauge manifold’s low-pressure valve (Lo) and fully shut its high-pressure valve (Hi). (High-pressure valve subsequently requires no operation.)
3) Do vacuum pumping and be sure that the compound strain gauge reads –0.1MPa (–76cmHg).
4) Close gauge manifold’s low-pressure valve (Lo) and cease vacuum pump. (Keep this state for a couple of minutes to be sure that the compound strain gauge pointer doesn’t swing again.)
5) Remove caps from liquid cease valve and gasoline cease valve.
6) Turn the liquid ceases valve’s rod 90 levels counterclockwise with a hexagonal wrench to open the valve. Close it after 5 seconds, and test for gasoline leakage. Using soapy water, test for gasoline leakage from indoor unit’s flare and out of doors unit’s flare and valve rods. After the test is full, wipe all soapy water off.
7) Disconnect charging hose from gasoline cease valve’s service port, then totally open liquid and gasoline cease valves. (Do not try to show valve rod past its cease.)
8) Tighten valve caps and repair port caps for the liquid and gasoline cease valves with a torque wrench on the specified torques.
Step4. Refilling the refrigerant.
Check the kind of refrigerant for use on the machine nameplate. Precautions when including R410A Fill from the liquid pipe in liquid kind. It is a combined refrigerant
so including it in the gasoline kind might trigger the refrigerant composition to alter, stopping regular operation.
Before filling, test whether or not the cylinder has a siphon connected or not. (It ought to have one thing like “liquid filling siphon attached” displayed on it.)
To refill the refrigerant:
1. Filling a cylinder with a connected siphon.
2. Stand the cylinder upright when filling (There is a siphon pipe inside, so the cylinder needn’t be upside-down to fill with liquid).
3. Filling different cylinders.
4. Turn the cylinder upside-down when filling.
Note: Be positive to make use of the R410A instruments to make sure strain and to stop overseas objects from getting into.
Step5. Refrigerant piping work.
1. Cautions on pipe dealing with.
a) Protect the open finish of the pipe towards mud and moisture.
b) All pipe bends ought to be as light as doable. Use a pipe bender for bending.
2. Selection of copper and warmth insulation supplies
When utilizing industrial copper pipes and fittings, observe the next:
1) Insulation materials: Polyethylene foam Heat switch price: 0.041 to 0.052W/mK (0.035 to 0.045kcal/(mh •°C)) Refrigerant gasoline pipe’s floor temperature reaches 110°C max.
Choose warmth insulation supplies that can stand up to this temperature.
2) Be positive to insulate each the gasoline and liquid piping and to offer insulation dimensions as under:
| Gas side | Liquid side | Gas pipe thermal insulation | Liquid pipe thermal insulation |
| O.D. 9.5mm | O.D. 6.4mm | I.D. 12-15mm | I.D. 8-10mm |
| Minimum bend radius | |||
| 30mm or more | Thickness 10mm Min. | ||
| Thickness 0.8mm (C1220T-O) |
3) Use separate thermal insulation pipes for gasoline and liquid refrigerant pipes.
Step6. Standby Electricity Saving
- Procedure for turning ON standby electrical energy saving perform
1) Check that the principal energy provided is turned OFF. Turn it OFF if has not been turned OFF.
2) Remove the cease valve cover.
3) Disconnect the selective connector for standby electrical energy saving.
4) Turn ON the principle energy provide.
Notes:
Before connecting or disconnecting the selective connector for standby electrical energy saving, guarantee that the principle energy provided is turned OFF.
The selective connector for standby electricity saving is required if an indoor unit aside from the above relevant ones is linked.
Step7. Pump Down Operation
To defend the surroundings, make sure to pump down when relocating or disposing of the unit.
1) Remove the valve cap from the liquid stop valve and gasoline cease valve.
2) Carry out the compelled cooling operation.
3) After 5 to 10 minutes, shut the liquid stop valve with a hexagonal wrench.
4) After two to a few minutes, shut the gas stop valve and cease the compelled cooling operation.
How to forced cooling operation mode?
1) Using the indoor unit ON/OFF button
Press the indoor unit ON/OFF button for no less than 5 seconds. (Operation will begin.)
The forced cooling operation will stop routinely after around 15 minutes. To power a trial operation to cease, press the indoor unit ON/OFF button.
2) Using the principle unit’s distant controller
a) Press the “ON/OFF” button. (Operation will begin.)
b) Press the “TEMP” button and the “MODE” button at a similar time.
c) Press the “MODE” button twice.
d) Press the “MODE” button to return the operation mode to cooling.
• Trial operation will cease routinely after round 30 minutes. To power a trial operation to cease, press the “ON/OFF” button.
3) Using the outside unit compelled cooling operation switch (with standby electrical energy saving perform turned OFF).
a) Push-on “ ” with a screwdriver. The unit will begin working.
b) The compelled cooling mode is chosen and terminates in approx. 15 minutes.
Notes:
1) When urgent the swap, don’t touch the terminal block. It has an excessive voltage, so doing so might cause electrical shock.
2) After closing the liquid cease valve, shut the gas stop valve inside three minutes, then cease the compelled operation.
Step8. Wiring
1) Do not use tapped wires, stranded wires, extension cords, or starburst connections, as they might set off overheating, electrical shock, or hearth.
2) Do not use locally purchased electrical elements contained within the product. (Do not branch the facility for the drain pump, and plenty of others., from the terminal block.) Doing so may cause electrical shock or hearth.
3) Be constructive to place in an earth leakage breaker. (One that will take care of larger harmonics.) (This unit makes use of an inverter, which signifies that it ought to be used as an earth leakage breaker efficiently dealing with harmonics with an objective to stop malfunctioning of the earth leakage breaker itself.)
4) Use an all-pole disconnection type breaker with a minimum of 3mm between the contact degree gaps.
5) Do not join the facility wire to the indoor unit. Doing so may trigger electrical shock or hearth.
6) Do not flip ON the safety breaker until all work is achieved.
Step9. Trial operation
1) Measure the provision voltage and guarantee that it falls within the specified vary.
2) Trial operations ought to be carried out in both cooling and heating mode.
• In cooling mode, choose the bottom programmable temperature; in heating mode, choose the very best programmable temperature.
a) Trial operation could also be disabled in both modes relying on the room temperature. Use the distant controller for trial operation as described below.
b) After the trial operation is full, set the temperature to a standard stage (78°F to 82°F (26°C to 28°C) in cooling mode, 68°F to 75°F (20°C to 24°C) in heating mode).
c) For safety, the system disables restart operation for Three minutes after it’s turned off.
3) Carry out the check operation following the operation guide to make sure that all features and components, equivalent to fin motion, are working correctly.
• The air conditioner requires a small quantity of energy in its standby mode. If the system shouldn’t be for use for a while after setting up, shut off the circuit breaker to remove pointless energy consumption.
• If the circuit breaker journeys to close off the ability to the air conditioner, the system will restore the unique operation mode when the circuit breaker is opened once more.
Read also:
- Air conditioner capacitor what does it do?
- How to remove air conditioner?
- How to replace air conditioner ducts?
- What is a split system air conditioner?
- What is an air handler on an air conditioner?
- How to install a wall air conditioner?
- The ultimate guide to air conditioner troubleshooting
- How to clean air conditioner?
Step10. Test items
| Test objects | Symptom (diagnostic show on RC) | Check |
| Indoor and doors models are put incorrectly on a strong basis. | Fall, vibration, noise | |
| No refrigerant fuel leaks. | Incomplete cooling/heating perform | |
| Refrigerant fuel and liquid pipes and indoor drain hose extension are thermally insulated. | Water leakage | |
| The draining line is correctly put in. | Water leakage | |
| The system is correctly grounded. | Electrical leakage | |
| The specified wires are used for inter-unit wiring. | Inoperative or burn harm | |
| Indoor or doors unit’s air inlet or air outlet has a transparent path of air. Stop valves are opened. | Incomplete cooling/heating perform | |
| The indoor unit correctly receives distant management instructions. | Inoperative | |
| The warmth pump or cooling-only mode is selectable with the DIP change of the distant controller. | Remote controller malfunctioning | |
