
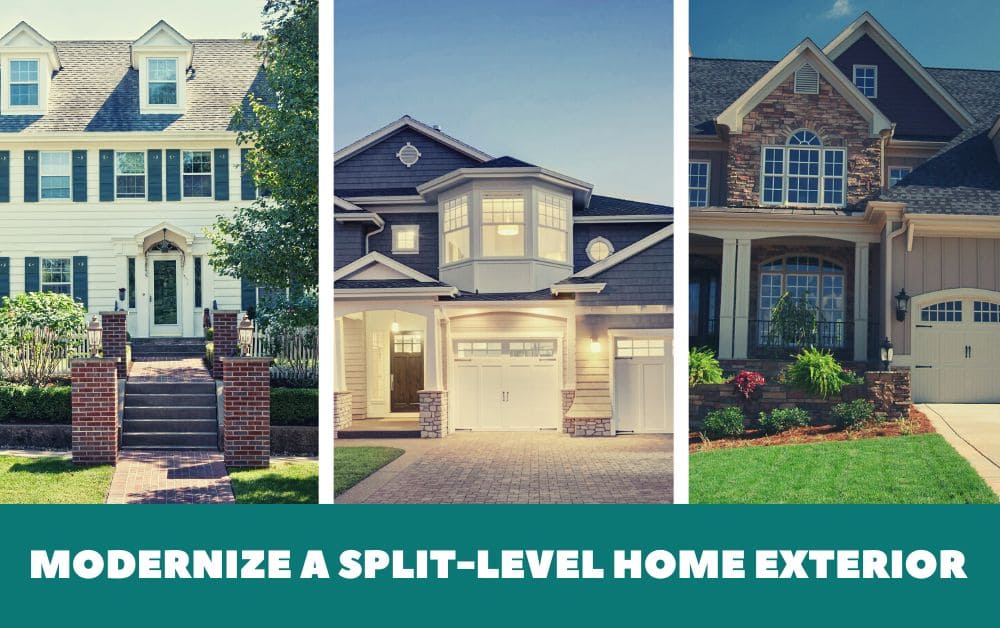
Split-level houses were famous from the 1960s to the 1980s. This type of house is one with staggering levels.
You can quickly notice the short and staggered stairs from the exterior. All of the floors and rooms tie together closely.
When you come into the house through the front door, you’ll see a staircase that goes up to the upper floor and directs you to the basement area.
This type of house might sound outdated. However, you can easily modernize and re-decorate it. In addition, the open-concept living arrangement offered by this style has attracted many people.
Thus, if you intend to purchase a split-level house or own it, we’ve gathered several worth-trying ideas to accentuate it. Stick with us to find out more about 3 house example Ideas. As always, Home out mind presents you with the list.
Without further ado let’s jump in!
What is a split?
Splits are unique for the way in which they divide the living spaces into multiple levels, shaking up the traditional American housing pattern of formal rooms on the main level, with bedrooms upstairs and a full basement below. Three factors drove this break with tradition.
First, home buyers were demanding more square footage in houses, but lots weren’t getting any wider. Stacking the bedrooms over the garage was a simple way to squeeze a larger house onto a lot.
Second, home buyers were looking for houses with a more substantial presence. Ranches, however efficient, just didn’t have the same emotional appeal as the traditional two-story Colonial or even the story-and-a-half Cape Cod. Splits look more substantial.
Third, and most important, builders in the Midwest were seeking ways to minimize the costs of excavating full basements.
Why is a split a split?
Splitting the house into different levels was a clever way to minimize excavation and simplify footings and foundation walls, hence reducing construction costs.
In southern states, where winters are warm, ranch houses can be built on simple (and inexpensive) slab-on-grade foundations.
In northern states, however, houses are built on stable “frost footings,” continuous strips of concrete poured safely below the depth of typical frost penetration.
Splitting the house allows a garage slab to be at grade, a basement level to sit a half-flight below grade, and both to sit on frost footings, safe from winter heaving (see illustration).
In other words, the split design is driven more by construction expediency than by design intent. This half-basement has additional advantages.
It’s less expensive to dig, for example. It also allows for taller windows, making for brighter, sunnier bedrooms (though split-level basement bedrooms still aren’t ideal).
And because it’s only a half level away from the living levels, it seems more like part of the house. In other words, it’s a “basement that isn’t really a basement.”
What’s a split-level and what’s a split-entry?
Two distinctly different house types—the split-level and the split-entry—are lumped together under the general description of “split.”
A typical split-level home has three or more distinct areas of living space, each separated by a half-level.
For example, the garage and family room are on the lower level, with the private bedroom area directly above it.
Halfway between, located vertically and adjacent to these spaces, is the formal living area, which brings the three spaces together.
Any house with three or more distinct living areas is a split-level.
A typical split-entry home has two distinct floors stacked on top of one another, connected by a flight of stairs, much like a ranch house raised halfway out of the ground.
The front entry, however, is located at the halfway point between the two levels, hence the term “split entry.”
Any house where the main entrance is on a separate level from the rest of the house is a split-entry
How to modernize a split-level home exterior (Top Best ideas From an Expert)
#// 1: Split – Entry Short – Faced
Let’s take an example short-faced home, Homes with short-faced like this example are still being constructed today because the design is so economical to build.
What makes this home type unique is that all social spaces–living, dining, and kitchen–are at the back of the house, while all the bedrooms face the street. For example, this home has four bedrooms, two bathrooms, and a two-car garage.
1. The house has two simple but low-pitched gable roofs oriented perpendicularly to each other.
2. The windows on the upper and lower levels are stacked or aligned, with a problematic “gutter” (or empty vertical space) running down the middle.
3. The upper level cantilevers over the lower level, a trick to gain more square footage without building more foundation.
4. A brick veneer base extends across the front of the house.
5. The two roof forms come together in an awkward way.
6. The garage is set back from the front of the house, but the huge garage door still dominates the facade.
7. The front door is set back more deeply than the garage door, making it almost invisible.
Note: the entryway is the biggest problem. this is the part of the house that everyone sees and is the first impression.”
#// 1: Ideas: Expanding & Rethinking The Entry
1. Extending a new front entry and a new front porch toward the street makes the front door, rather than the garage door, the focus of the street. Chairs add a welcome touch.
2. Placing the front door on the driveway side of the new entry creates space for a front porch and for a large front window, which allows more light into the new mudroom.
3. Placing columns in front of the existing house frames the new large entry window. Extending the roof provides shelter for some chairs and creates a welcoming front porch.
4. Removing the existing front entry wall allows for a larger foyer and mudroom.
5. Leaving the wall in place creates an airlock.
6. Adding a mudroom onto the existing entry creates space for a bench and storage cubbies, as well as more room for greeting guests.
#// 2: Split-entry long-faced
Let’s take an example of a house with an entry long-faced.
This particular home has four bedrooms, three bathrooms (two are also common), and a two-car, tuck-under garage.
The front door, which is unprotected and stuck on the front of the house like an afterthought, leads directly to the stair landing, which is in turn halfway between the upper and lower levels.
There is no space to turn around, greet guests, or sit to take off boots or shoes. Bedrooms are located on one side and public spaces (kitchen, living, and dining) are located on the other
1. The roof is often a straightforward single hip with no valleys or other complications. Gable roofs are also common in this type of split entry.
2. The horizontal siding, often as wide as 13”, emphasizes the house’s horizontal lines.
3. The large two-car garage is tucked under the bedroom wing and the huge garage door dominates the front facade of the house. The front door is like an afterthought.
4. The large window in the living room overlooks the front yard. While this house has a bow window, picture windows flanked by casements or double-hung are more common.
5. The front entry is on a separate level from the living and basement levels and is unprotected.
6. The site for this house type was typically graded to create an artificial slope.
#// 2: Ideas: Expanding & Rethinking The Entry
1. Projecting a glassed-in front entry from the house’s otherwise flat facade makes it much more inviting. At night with the lights on, the front entry becomes a “lantern” or beacon for the house, visible from the street and neighborhood.
2. Adding a new front entry makes the front door more prominent than the garage door. It also gives the house an architectural focus.
3. Moving the coat closet from the foyer to the top of the stairs frees up space on the landing, and invites guests up to the social spaces.
4. Expanding the entry foyer provides enough space to greet guests.
5. Extending the canopy over the front stoop creates a sheltered entry or porch.
#// 3: Split-Level Traditional
This split-level home, dating back to the 1950s, is the oldest and most traditional of the house types featured in this book.
The entry is on the same level as the social rooms, which makes it unique among the three types. This allows the stairs to be located in the middle of the house rather than near the front entry.
This particular home has three bedrooms, one-and-a-half baths, and just a one-car, tuck-under garage. It also has a fourth level–a completely below-grade basement located directly beneath the main entry level.
1. The two low-pitched gable roofs are oriented perpendicularly to one another on this house. Many houses of this type have hip roofs and a more Prairie styling.
2. The bedroom level sits above the single-stall garage and cantilevers over the lower level toward the street.
3. The house has no sidewalk. People have to walk up the driveway to reach the front door.
4. The large window in the living room that faces the street is a triple-wide double-hung in this particular house, but most often is a huge picture window.
5. The entry is on the same level as the living, dining, and kitchen spaces. There is no protection from rain or sun at the front door.
6. The house can only be built on a sloped site.
#// 3: Ideas: Expanding & Rethinking The Entry
1. The pergola and patio recreate the pleasures of a traditional front porch. The pergola shades the patio while still allowing natural light into the living room
2. Adding a hip roof over the front entry and a pergola over the front patio creates a porch, a place to hang out with friends and family and watch the neighborhood roll by.
3. Adding a gas fireplace provides a focal point for an otherwise bland room.
4. Adding an airlock, however small, separate the front entry from the living room.
5. Adding a small front porch with columns creates an inviting covered entry that reaches toward the street.
4: Stairs
Splits are defined by their many different levels. Stairs are necessary to connect the levels together.
While constantly running up and down these stairs can be frustrating, changing the stairs is both difficult and expensive.
Part of living in a split is coming to terms with the stairs. On the positive side, anyone who lives in a split has a built-in exercise machine!
That said, the most important change to make is not to the stairs themselves, but to the transition spaces at the landings. Nothing is worse than that feeling of stepping into a split, and immediately lurching down the steps.
In all three house types, we’ve shown ways to expand the front entries, creating places to greet guests and sit down to take off winter boots. This creates breathing room for the stairs.
5. Accessibility
Splits, because they are divided into so many different levels, and because stairs are so expensive and difficult to modify, are among the hardest house types to make accessible to people who are elderly, use walkers or wheelchairs, or have other mobility concerns.
For a house to work well for people with mobility problems, it must allow easy access to a car, a bathroom with a toilet and shower, a place to sleep, and a kitchen in which to prepare food.
In the two split-entry houses featured in this book, the garage is on a different level from the kitchen.
In the split-level design, not only is the kitchen separated from the garage by a flight of stairs but there’s an additional flight of stairs to get to a bathroom or bedroom.
The stairs are inherent to the split’s design, and really cannot be removed or altered without spending huge sums of money. One option is to add half-level chair elevators, the kind that attaches to a stairway, between the levels.
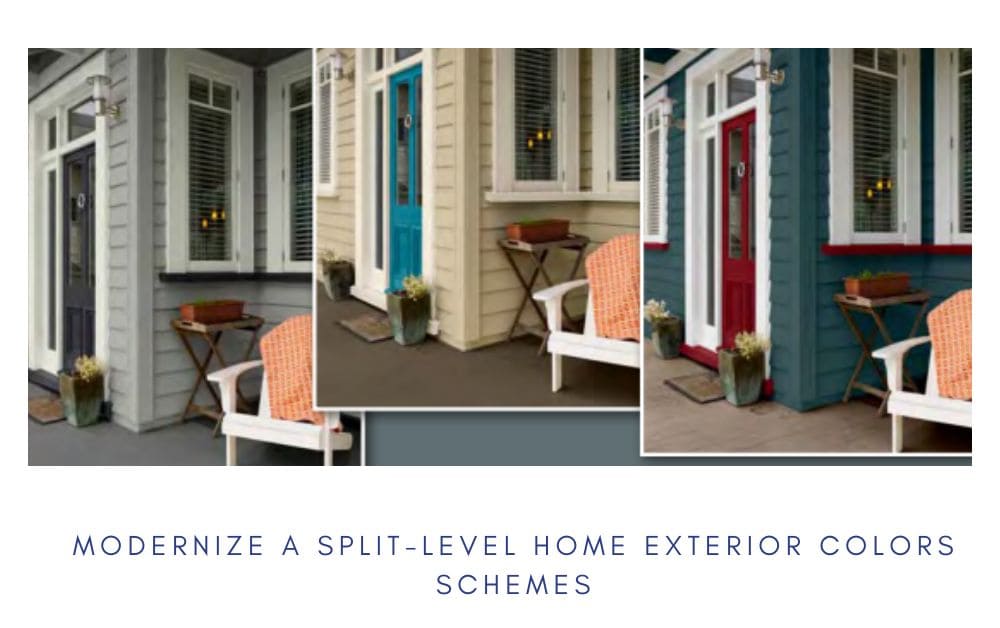
How to modernize a split-level home exterior colors schemes?
Home is often harder than doing the same job on the inside. For a start, there’s a lot of cladding, acres of roof, and fiddly bits to trip you up.
Then you’re up against our strong light quality which means colors can look very different than they do on the paint charts when you’re sitting indoors.
Often the style of your home will dictate the types of Resene exterior colors you use: heritage tones for a villa, soft gelato shades for an Art Deco stucco cottage, or brooding black for a contemporary masterpiece.
There are a surprising number of exterior features to consider when compiling a color scheme. There’s obviously the largest component
the main cladding material, which in itself can be split into various zones. Then there are the windows (again, these can become the site for various colors, especially with older homes like villas).
The roof is a large surface area and is often overlooked as having an important impact on the scheme. Always keep in mind, the steeper the pitch of the roof, the more of it will be visible.
For inspiration:
• Check out similar styles of houses in your neighborhood and the colors they are painted in.
• Keep a scrapbook of ideas you love, so you get a feel for your own style.
• Browse through the pre-designed schemes on the Resene EzyPaint software, or investigate the array of color swatches at Resene ColorShops. Bring a photo of your home and let the knowledgeable Resene staff help you choose.
If your house is an older character home, check out the Resene Heritage color palette for color inspiration.
It also has a short but interesting look back at the typical styles of older homes in this country. Always test your color with a Resene test pot, as colors change depending on what they are painted onto and the quality of the light.
Colors usually look much lighter outdoors. They also change if you put them beside other colors: a grey roof makes green walls look.
fresher, and a high-gloss finish (rather than a low-sheen finish) renders the color brighter. Contrasts make a color scheme more interesting, but make sure you only highlight details if they deserve the focus. A bright red front door, yes, but maybe not an old garden shed.
Soft mushroom shades have been fashionable, but there’s a move towards cleaner colors with greyer bases. Or you might tip those grey tones over into slatey blues like Resene El Nino
Come on in (ideas)
Front doors are an important part of your exterior scheme. They signify the entry, welcome visitors, and are often the most cheerful component of your home’s exterior – like a smile on your face.
This is the one area where you can be bold in your color choice, whether that’s the deepest black or a vibrant bright.
A high-gloss finish will then bring out the depth and richness of such colors. Red is a perennially popular front door color but there are plenty of other exciting tones in the Resene color range to choose from.
1. A very sophisticated scheme, perfect for those inner-city villas
• All crisp and urban in greys and black
• This scheme centers around a glossy black door and doorstep in Resene Nero surrounded by architraves in Resene Double Concrete.
• The weatherboards are in bone white Resene Half Black White, and the veranda boards are in Resene Trojan.
2. Taking its cue from the pretty vintage interior schemes that so beautifully partner our character homes, this uses the warmth of Resene Eighth Bison Hideto,
support a door in fun-loving Resene Mandy, while the veranda boards are in the soft mushroom brown of Resene Americano. The trims are in Resene Half Alabaster.
3. Bring a little bit of carefree Cape Cod style to your home.
• Awash with tones of the sea, this scheme is perfect not only for our older weatherboard houses but also for a country that has such a lot of coastline.
• The weatherboards are a soft duck egg grey Resene Tiara, set off by a front door in the wintry grey slate blue Resene Atomic, and veranda boards and doorstep in the free-spirited Resene Rolling Stone.
• The trims are in the cool Resene Quarter Black White.
• The existing red and orange pots and cushions pop out against this cool coastal-style scheme.
4 When habitat magazine featured this classic square-front villa front door on its cover a few issues ago, the scheme was inspired by the cheerful colors of Mexico
• Saturated turquoise veranda boards (Resene Calypso), a fluoro orange/red door (Resene Daredevil), and sherbert yellow weatherboards (Resene First Light).
• Resene Alabaster is used as a clear white for the trims and deep blue Resene Billabong for the doorstep.
Tips:
A tried-and-true method for developing a color scheme centers on three or four colors – one for the main body of the house, another for the trims, and another for the roof.
The fourth is an accent color to create a striking front door. Fences can then be painted in either the main or trim color.
What to look for when starting a remodeling split-level home project?
1. Have a clear goal
The key to any successful renovation project is knowing what you want to achieve and focusing all your efforts toward achieving that goal.
Whether you need to solve a storage problem, rebuild a deck, or add a bathroom, stay focused and on-task.
This may sound like simplistic advice, but remodeling projects often go awry when homeowners lose track of their original goal and try to do too much.
It sounds reasonable to increase the scope of the project during construction. “As long as the builder is here, shouldn’t we replace all the windows?” But this kind of scope creep (as it’s called in the building professions) inflates the project budget, expands the construction schedule, and contributes to the project spiraling out of control.
2. Know your budget & schedule
It seems obvious, but know how much money you have available for your project. Line up loans before construction starts. Know how much cash you have in savings.
Convert stocks or other assets to cash before you begin construction, so you’re not vulnerable to swings in the market.
And always—always!—budget extra dollars for potential cost overruns. Some projects go smoothly from the moment construction starts, but even the best-laid plans can go awry during the fog of construction. Backordered materials can delay construction.
Builders can wrench their backs. Inspection schedules can fall behind. Prices can come in higher than anticipated. Having a financial cushion will greatly reduce the stress during construction.
3. Get a handle on the real costs
Estimating remodeling costs is a chicken-and-egg dilemma: You can’t know the real cost of your project until you’ve prepared final working drawings (also known as blueprints or construction documents) and obtained a detailed estimate from a builder, yet it doesn’t make sense to complete the working drawings if the project will cost too much.
The most accurate way to predict remodeling costs is to look at precedents: How much did projects of similar scope really cost?
• Talk to builders and architects who have recently built projects similar to yours.
• Talk with friends, relatives, and neighbors who have remodeled their kitchens or rebuilt their decks.
• Take the leap and ask them how much it all costs.
But beware of an understatement. Homeowners are often reluctant to admit how much they actually spent on a remodeling project, and thus frequently underreport project costs.
This under-reporting perpetuates misunderstandings about real costs
4. Research zoning restrictions
Before beginning any design work, take the time to research zoning restrictions on your lot. Call your municipality to find out the setbacks for the front, rear, and side yards.
• Ask how far roof overhangs can protrude into a setback. If you’re planning a garage addition, ask for the different setback requirements for an attached versus a detached garage.
• Ask if your municipality has maximum lot coverage restrictions.
• Ask about maximum height, and how it’s calculated. Describe your planned project and always, always ask what else you need to know
5. Hire an architect or designer
Your next step is to hire an architect or designer. This individual will design your remodeling project and complete the working drawings necessary to get bids, pull a building permit, and start construction.
• Architects bring a special set of skills to design.
• They are trained to think through the whole process and ask: How will the whole house look after the project is complete? How do all the parts work together?
• An architect also works for you, not the builder, and brings the knowledge and experience of having gone through the process many times before.
6. Hire a builder
• Begin researching builders early in the design process.
• Attend local remodeling shows.
• Get recommendations from neighbors who have remodeled.
• Look for job site signs in your neighborhood to see which builders are working on projects similar to yours.
• Ask architects and designers for recommendations.
• Ask sub-contractors which builders run the tightest,
7. Pull a building permit
Typically the builder applies to the municipality for the building permit. A building permit is required for most construction.
If there are any questions, check with your municipality. Always allow at least two weeks for a permit to be issued.
• Note that do-it-yourselfers are required to follow the same steps as a professional remodeler.
• Do-it-yourselfers still need to file a building permit, submit energy calculations (if required), and submit to all required inspections.
8. Keep your sense of humor
• Remodeling is inherently stressful. It’s noisy, messy, and disruptive.
• You’ll wake up to pounding and hammering.
• Sheetrock dust will infiltrate your dresser drawers. Pick-up trucks will be parked in your driveway for months on end.
• You’ll be washing dishes in your bathtub while the kitchen is torn up.
One way to minimize the length of time you have to undergo construction stress is to make all your consumer selections ahead of time. Paint colors, plumbing fixtures, doorknobs, and light fixtures are all best chosen before remodeling begins.
The worst time to pick a paint color, for example, is when the whole painting crew is standing there, anxious to begin work.
So keep your sense of humor, and remember that this, too, shall pass. And in the end, your home will be fresh and new, ready for decades more of living.
FAQs
What do you like about your split-level home?
• The distinct separation of different levels for different uses. The bedrooms are in one area, the living room, dining room, and kitchen are in another area, and the family room and utility rooms are in still another.
• The basement doesn’t seem like a basement. This refers to the lower level being only partially underground, thus allowing for larger windows and more light in the spaces.
• The open floor plan. Having levels only half a flight away makes the homes seem more open and connected. The open entry also adds to this feeling.
What do you dislike about your split-level home?
• The front entry is too small. There is not enough room on the landing and the coat closet is often cramped.
• There is a lack of storage and closet space. The bedroom closets are too small and there is little general storage.
• There are heating problems and it’s especially difficult keeping a common temperature on all levels.
• There are too many stairs. It’s hard to bring in groceries and hard for the elderly to get around.
• The homes lack style and curb appeal. The fronts of the homes are often bland and the entries are subdued.
What would you change about your split-level home?
• Enlarge the foyer/entry and make it easier to meet and greet guests.
• Increase the size of the kitchen and make it more open.
• Improve the exterior appearance of the house, especially the front entry and the flat front.
• Add windows and more natural light to the kitchen, dining room, entry, bathrooms, and basement.
• Create a master suite and a master bath.
Read Also:
