Have you recently purchased a new electric water heater but find yourself unsure of how to turn it on? Don’t worry; we’ve got you covered. Before even considering turning on the water heater expansion tank, it’s crucial to verify and follow specific steps and instructions.
In this guide, we’ll walk you through the process step by step to ensure a safe and efficient activation of your electric water heater. Let’s get started.

Step 1: Install Shutoff and Tempering Valves
1. If not already installed, place a manual shutoff valve in the cold water line supplying the water heater. Ensure it’s positioned near the heater for easy access.
- Use only valves compatible with potable water, such as full-flow ball or gate valves.
- Install a thermostat Mixing Valve at each point of use, following the manufacturer’s instructions.
Step 2: Connect the Water Supply
1. Identify the type of water pipes in your home and use appropriate fittings for copper, CPVC, or PEX pipes.
- Connect the cold water supply to the cold water inlet nipple using 3/4 inch National Pipe Thread “NPT.”
- Consider using dielectric-type unions to prevent corrosion and extend the water heater’s lifespan.
- Insulate water pipes, especially in freezing temperatures.
Step 3: Verify Connections and Fill the Tank
1. Remove the aerator at the nearest hot water faucet and allow water to run for three minutes.
- Check for leaks in inlet and outlet connections and repair any detected.
Step 4: Electrical Connections
1. Ensure power to the water heater is turned OFF at the circuit breaker panel.
- Verify the correct voltage, wiring size, and circuit breaker range for the water heater.
- Follow the wiring diagram on the water heater for proper electrical connection.
- Connect ground wire to the green ground screw and home’s power wires to the heater’s wires.
- Replace the electrical junction box cover securely.
Step 5: Adjusting the Temperature
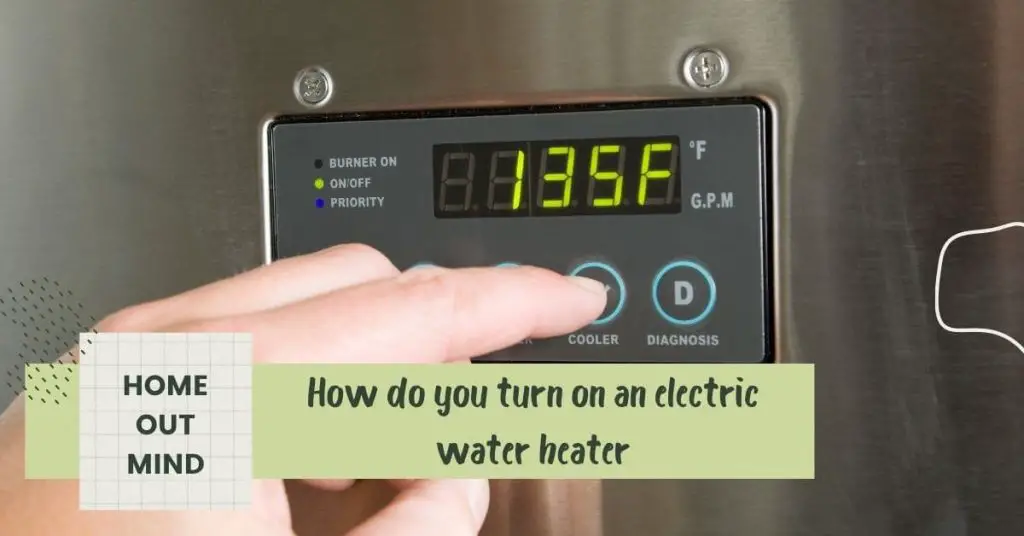
1. Set the thermostat(s) to the desired temperature, typically around 120°F to prevent scalding.
- Higher temperatures (140°F) can reduce bacterial growth and eliminate “smelly water.”
- Install Thermostat Mixing Valves at each point of use for scald prevention.
- Adjust thermostat settings using appropriate precautions and replace access panels.
Step 6: Operation
With the water heater correctly connected and adjusted, it’s now ready for normal operation.
Monitor its performance regularly to ensure safety and efficiency, and address any issues promptly.
How do I know if my electric water heater is on?
To determine if your electric water heater is on, you can follow these steps:
1. Check the Power Source:
Ensure that the electrical circuit supplying power to the water heater is active. You can verify this by checking the circuit breaker panel to see if the corresponding breaker is in the “on” position.
If the breaker is tripped or turned off, the water heater will not receive power and will not be able to heat water.
2. Listen for Activity:
Stand near the water heater and listen for any sounds of activity. When the water heater is actively heating water, you may hear a faint humming or buzzing sound coming from the heating elements or the thermostat.
3. Touch the Tank:
Carefully place your hand on the outer surface of the water heater tank. If the tank feels warm to the touch, it’s likely that the heating elements are activated and the water heater is on. However, exercise caution to avoid burns, especially if the tank is hot.
3. Check the Temperature Setting:
Locate the temperature control dial or panel on the water heater and verify the temperature setting.
If the setting is higher than the current water temperature, it indicates that the water heater is actively heating water to reach the desired temperature.
4. Observe Indicator Lights:
Some electric water heaters feature indicator lights that illuminate when the heating elements are active.
Check for any illuminated lights on the control panel or near the thermostat to confirm that the water heater is on and heating water.
How to adjust the temperature of the hot water on your electric water heater?
To adjust the temperature of the hot water on your electric water heater, follow these steps:
1. Locate the Temperature Adjustment Dial:
The temperature adjustment dial is typically located on the front or side of the water heater near the bottom.
It may be labeled with temperature settings or simply feature a dial with temperature markings.
2. Turn Off the Power:
Before making any adjustments, turn off the power to the water heater at the circuit breaker panel. This is crucial for safety to prevent electrical shocks or burns.
3. Remove Access Panels:
If your water heater has access panels covering the temperature controls, remove them to access the adjustment dial.
4. Adjust the Temperature Setting:
Using a screwdriver or your hand, rotate the temperature adjustment dial to the desired temperature setting. Most water heaters have temperature markings or indicators to help you select the appropriate temperature.
- The recommended temperature setting for most households is around 120°F (49°C) to prevent scalding and reduce energy consumption. However, you may adjust the temperature higher or lower based on your preferences and needs.
5. Replace Access Panels:
Once you’ve adjusted the temperature setting, securely replace any access panels that were removed.
6. Turn On the Power:
- Return to the circuit breaker panel and turn the power back on to the water heater.
7. Wait for the Water to Heat:
It may take some time for the water heater to reach the new temperature setting. Allow sufficient time for the water to heat up before testing the hot water at your faucets.
8. Test the Water Temperature:
- Carefully test the hot water at a faucet to ensure that it has reached the desired temperature.
- Adjust the temperature setting further if necessary to achieve your desired comfort level.
Why is my electric water heater not giving hot water?
If your electric water heater is not producing hot water, several factors could be contributing to the issue.
Here are some common reasons why your electric water heater may not be providing hot water:
1. Power Supply Issues:
Check if the water heater is receiving power. Ensure that the circuit breaker supplying power to the water heater is not tripped or turned off.
If the breaker is tripped, reset it and monitor if the water heater starts functioning again. If the breaker continues to trip, there may be a wiring problem or electrical issue that requires professional attention.
2. Thermostat Malfunction:
The thermostat on the water heater regulates the temperature of the water. If the thermostat is malfunctioning or set incorrectly, it may prevent the water heater from heating water to the desired temperature.
Check the thermostat settings and verify if they are adjusted correctly. If the thermostat is defective, it may need to be replaced by a qualified technician.
3. Heating Element Failure:
Electric water heaters contain one or more heating elements that heat the water. If a heating element fails or burns out, it can result in insufficient heating or no hot water at all.
Test the heating elements for continuity using a multimeter to determine if they are functioning properly. If a heating element is defective, it will need to be replaced.
4. Sediment Build-Up:
Over time, sediment and mineral deposits can accumulate inside the water heater tank, especially in areas with hard water.
This sediment can insulate the heating elements, reducing their efficiency and causing the water heater to produce less hot water. Flushing the water heater to remove sediment buildup can help restore its efficiency and improve hot water production.
5. Faulty Dip Tube:
The dip tube is a component that directs incoming cold water to the bottom of the tank for heating.
If the dip tube is broken or deteriorated, cold water may mix with the hot water near the top of the tank, resulting in lukewarm or cold water at the faucets.
Inspect the dip tube for signs of damage and replace it if necessary.
6. Water Heater Size:
If your water heater is undersized for your household’s hot water demands, it may struggle to keep up with the demand for hot water, especially during peak usage times.
Consider upgrading to a larger capacity water heater if you frequently experience inadequate hot water supply.
Frequently asked questions
How to test a water heater element?
To test a water heater element, start by turning off the power to the heater and draining the tank partially. Then, disconnect the wires from the element and use a multimeter to measure the resistance across the terminals.
Compare the reading to the manufacturer’s specifications to determine if the element is functioning correctly. For a detailed guide on testing a water heater element, check out our comprehensive article on Testing a Water Heater Element.
How to turn up a hot water heater electric?
Adjusting the temperature on an electric hot water heater is straightforward. Locate the thermostat panel on the heater, remove the cover, and use a screwdriver to adjust the temperature dial to your desired setting.
Remember to consider energy consumption and the risk of scalding when setting the temperature. For detailed instructions, including safety precautions, refer to our guide on Turning Up a Hot Water Heater Electric.
How to vent a tankless water heater?
Proper venting of a tankless water heater is crucial for safe operation. Refer to the manufacturer’s guidelines to determine the appropriate venting requirements for your specific model.
Select the correct type and size of vent pipe according to local building codes and regulations. Install the vent pipe securely, ensuring proper alignment and sealing to prevent leaks and maintain optimal airflow.
For step-by-step instructions, explore our comprehensive guide on Venting a Tankless Water Heater.
Why is the water heater leaking?
Water heater leaks can occur due to various reasons, including loose fittings, corroded pipes, or a faulty pressure relief valve.
Inspect the water heater for visible signs of leakage and address any loose connections or damaged components. If the leak persists, check the pressure relief valve for malfunctions and replace it if necessary. For a detailed explanation of common causes and troubleshooting tips, refer to our article on Why Is the Water Heater Leaking?
How to fix an RV water heater?
Fixing an RV water heater involves several steps to ensure proper operation. Start by inspecting the heater for visible signs of damage or malfunction. Check the burner assembly, ignition system, and connections for any issues.
If necessary, clean or replace components as needed. Additionally, check for leaks and address them promptly. For a comprehensive guide on troubleshooting and fixing RV water heaters, explore our article on How to Fix an RV Water Heater.
Conclusion:
In conclusion, adjusting the temperature setting on your electric water heater can help save energy, especially when you’re away for an extended period.
By following the steps outlined, you can easily manage your water heater’s operation and ensure efficient performance. With proper maintenance and temperature adjustments, you can enjoy consistent hot water without any difficulty.


