
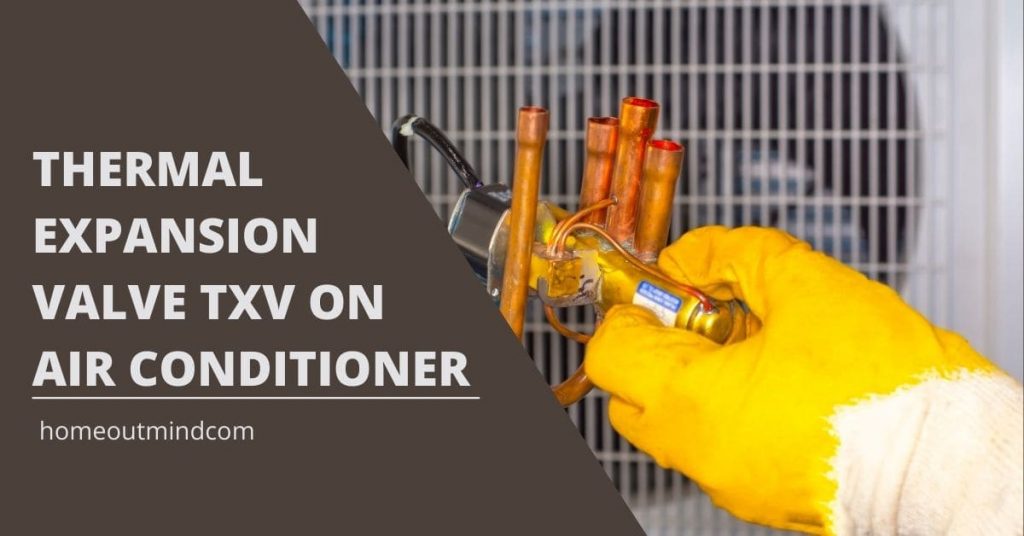
What is a txv on an air conditioner?
Thermal expansion valve txv on air conditioner package is designed to be used in air conditioner and warmth pump programs. The package consists of a thermal growth valve with an exterior equalizer, a copper becoming meeting (for exterior equalizer), and a sensing bulb clamp. Once put in, the TXV will regulate the refrigerant circulation by monitoring the superheat of the system. See Table 1 to find out the right package primarily based on the refrigerant sort and tonnage of the unit.
WHAT TO DO PRE-INSTALLATION TXV?
1. Disconnect all electrical energy to the furnace/ air handler.
IMPORTANT NOTE: The unit could have a couple of energy provide. Refer to the producer’s directions for added electrical info.
2. Remove the coil entry door from the indoor unit (if relevant) to reveal the A-coil and distributor.
NOTE: It could also be essential to take away the coil from the coil case.
3. Recover all refrigerant within the system (if relevant).
HOW TO INSTALL TXV WITH C5 COILS?
1. Using two wrenches, loosen the distributor and liquid line physique halves. Turn the meeting nut counterclockwise.
2. Unscrew the swivel nut and take away the fastened orifice.
3. Install the thermal growth valve between the distributor and the three/eight liquid.
a. Connect the liquid line to the inlet aspect of the valve.
b. Connect the distributor to the outlet facet of the valve.
C. Using two wrenches, tighten each end of the valve.
4. Modify the shut of the plate by bending again a piece of the highest proper nook.
NOTE: This will permit the exterior equalizer and sensing bulb to succeed in the refrigerant traces outdoors of the coil field.
5. Reinstall the close-off plate and route the sensing bulb and exterior equalizer by way of the opening.
6. Install the grommet within the suction line gap of the close-off plate. Verify the grommet is evenly aligned across the tube and securely positioned.
7. Install the becoming meeting that’s provided with the package on the top of the suction line.
9. Braze the becoming meeting, reducers (if relevant), and particular person traces connections along with dry nitrogen flowing by way of the joints. This will forestall inside oxidation and scaling from occurring.
10. Install the exterior equalizer and a sensing bulb.
The coil is the portion of the air conditioner that absorbs the recent air from inside your house and transfers it to the refrigerant. It pairs with the condenser coil to create a steady loop of warmth switch
NOTES:
• The becoming meeting has to be positioned shut sufficient to the indoor coil so that the exterior equalizer tube from the TXV can attain the becoming, however, nonetheless permit room for the sensing bulb to suit flushes towards the suction line without hitting the braze joint of the exterior equalizer.
• Position the becoming meeting on the suction line so that the 1/4” entry becoming is pointing vertically. If the entry becoming is pointed downwards, oil from the suction line will drain into the exterior equalizer.
• Depending on the suction line diameter, two reducers could have to be added to the suction line earlier than the becoming meeting is brazed on.
• The sensing bulb has to be situated flush towards the suction line for optimum warmth switch.
• Avoid attaching the sensing bulb to the bottom of a part of the suction line the place condensate could accumulate.
• Do not find the sensing bulb on vertical sections of the road set.
• For horizontal traces, the bulb shouldn’t be situated on the 12 or 6 o’clock place of the suction line. The finest location is at Four or eight o’clock.
• The exterior equalizer and sensing bulb could also be put in on the refrigerant traces outdoors of the coil cupboard. Both tubes might want to go by way of the close-off plate to get to the skin of the coil cupboard.
• For further info on correct sensing bulb areas, please check with the valve producer’s directions.
a. Connect the equalization line from the TXV to the becoming meeting.
b. Secure the sensing bulb to the suction line utilizing the clamp provided with the package.
c. Wrap the bulb and suction line along with tar tape or different insulating materials.
HOW TO INSTALL TXV ON AIR CONDITIONER WITH C6 COILS?
1. Remove the cap from the valve holder.
2. Verify coil pressurization by miserable the Schrader valve. Listen for any escaping fuel. If there is no such thing as a strain, check the coil for leakage.
• If leakage is discovered, clearly mark the situation of the leak and return the coil to the distributor for processing.
• If no leaks are discovered, the TXV could also be put in.
3. Depress the valve till all stress is launched from the coil.
4. Using two wrenches, take away the valve holder nut from the liquid line. Keep the nut for future use.
5. Remove and discard the Schrader valve and valve holder from the liquid line. NOTE: Do not reuse the O-ring, valve, or threaded valve holder.
6. Remove the retaining nut securing the dogleg or bulkhead extension to the. Keep the retaining nut for future use.
7. Using two wrenches, loosen the distributor and bulkhead extension, turning the nut counterclockwise.
8. Remove and discard the bulkhead extension from the distributor (cased coils solely).
9. Route and minimize the liquid line set tube to the right size following the outside unit specs. Verify the ends are spherical, clear and free from any burrs.
10. Install the accent retaining nut and the liquid line stub onto the liquid line set.
11. Braze the road set and liquid line stub along with dry nitrogen flowing by the system. This will forestall inside oxidation and scaling from occurring.
12. Install the thermal enlargement valve
a. Fasten the outlet finish of the TXV to the threaded finish of the distributor.
b. Install the bulkhead becoming onto the tip of the TXV (If relevant).
c. Install the internally toothed washer over the inlet finish of the TXV or bulkhead becoming (if relevant).
d. Install the condensation deflector over the inlet finish of the TXV or the bulkhead becoming (if relevant).
e. Insert the threaded finish of the TXV or the bulkhead becoming (if relevant) through the opening within the case. f. Install the TXV retaining nut (eliminated earlier in step 6) onto the TXV or bulkhead becoming (if relevant).
g. Install the liquid line and retaining nut onto the tip of the TXV or the bulkhead becoming (if relevant).
13. Install the exterior equalizer and a sensing bulb.
NOTES:
• The sensing bulb has to be positioned flush towards the suction line for optimum warmth switch.
• Avoid attaching the sensing bulb to the bottom of a part of the suction line the place condensate might accumulate.
• Do not find the sensing bulb on vertical sections of the road set.
• For horizontal strains, the bulb shouldn’t be positioned on the 12 or 6 o’clock place of the suction line. The greatest location is at four or eight o’clock.
• For further info on correct sensing bulb areas, please consult with the valve producer’s directions.
a. Connect the equalization line from the TXV to the 1/four port positioned on the suction line.
b. Secure the sensing bulb to the suction line utilizing the clamp provided with the equipment.
c. Wrap the bulb, clamp, and suction line along with tar tape or different insulating materials.
h. Using two wrenches, tighten all connections.
How to fix an Undersized or inefficient compressor?
If the compressor capacity is low, the suction stress shall be greater than regular and the superheat shall be beneath. If this situation is suspected, seek the advice of the compressor producer.
How to Low superheat setting?
On externally adjustable valves, flip the adjusting stem clockwise to extend the superheat.
How to fix the Moisture problem on TXV?
Any moisture within the system can freeze within the TXV, stopping the valve from functioning as meant. If that is suspected, set up a high-quality liquid-line filter drier. It is also advisable to put in a liquid-line moisture indicator to allow the technician to watch the moisture stage throughout the working system.
How to clean Dirt or debris on txv on air conditioner
Any overseas materials that will get previous the inlet strainer can turn out to be lodged between the pin and the port of the TXV, stopping it from correctly closing. Here once more, a high-quality filter-drier ought to be put in within the system to forestall the circulation of filth and particles and trigger system malfunctions.
How to repair TXV seat leak?
the port doesn’t seat correctly, the liquid refrigerant will circulation by way of the valve when there ought to be none. Inspecting the valve could reveal filth and particles, wherein case the TXV could be cleaned and put again into service. Inspection may reveal harm to the pin or port on account of wire drawing or erosion of the pin. In such a case, the valve ought to be changed.
How to fix Incorrect bulb position?
Ideally, the facility component bulb ought to be hooked up to a horizontal run of suction line—instantly after the evaporator outlet. It ought to be near the equalizer connection, however upstream of it. The bulb must be firmly hooked up to the suction line to take care of good thermal contact. Additionally, the bulb should not be influenced by exterior sources of warmth.
How to repair Insufficient Delta P throughout the valve?
If the pressure drop throughout the valve is just too low the valve’s capability is lowered. This generally occurs throughout low ambient operation when the top stress is allowed to “float” with the ambient. To right for this, elevate the top stress or change the valve with one which has a bigger capability.
How to fix Flash gas at inlet to TXV?
Any restrictions within the liquid line resulting in the TXV inlet will trigger a stress drop and lead to the flash-gas formation. Because the gasoline density is way lower than that of the liquid refrigerant, having flash gasoline feeding the TXV will scale back the valve’s capability and trigger excessive superheat and hunger. Flash gasoline could be discovered within the following methods:
1. Look for frost or moisture on the liquid line. As the flash gasoline is shaped, it causes a refrigeration impact making the world around it chilly. Since the liquid line is often heated to the contact, a chilly spot is normally a positive signal {that a} restriction exists at that time.
2. If a sight glass is put in, search for bubbles. A gentle stream of bubbles signifies both a low cost or vapor within the liquid line.
3. Check for subcooling. If the subcooled liquid is current on the outlet of the condenser, but not on the inlet of the evaporator, then decide the place you may have misplaced the subcooling. In some circumstances, the liquid line could also be undersized, or the liquid-to-suction warmth trade could have been misplaced, leading to a lack of subcooling.
How to fix Plugged equalizer line?
If the equalizer line is plugged, the pressure beneath the diaphragm might be larger than the precise evaporator stress, leading to a valve that tends to be in an extra “closed” place. To right this, substitute or restore the equalizer line.
How to fix Valve too small?
Check that the valve is accurately sized for the system. Replace with the correctly sized valve.
How to reduce Superheat adjusted too high?
On externally adjustable valves, flip the adjusting stem counterclockwise to lower the superheat.
How to repair Power meeting failure or partial lack of cost?
If the ability meeting has misplaced all or a part of its cost, it won’t generate enough stress to trigger the valve to “open.” A tech can confirm this within the area by holding the bulb in his hand while monitoring the system’s working circumstances.
Hand heat ought to trigger the stress to extend, leading to elevated refrigerant circulate and a rise in suction stress. If no change is famous, the valve might have misplaced its cost.
This method is just legitimate if the system is accurately charged and the valve has high-quality liquid refrigerant at its inlet. If it’s discovered that the valve has misplaced its cost, the ability meeting has to be changed. In some circumstances, the ability meeting is an integral part of the TXV, wherein case all the valves have to be changed.
How to fix Strainer clogged?
Dirt or particles within the refrigerant resulting in the valve may end up in the strainer turning into clogged. Remove and clean the strainers and add a high-capacity liquid-line filter drier to stop a recurrence.
How to fix Valve oversized for application?
A valve that’s too massive for the appliance will be inclined to hunt. If that is suspected, substitute the valve with one that’s accurately sized for the appliance.
How to locate the bulb of txv on air conditioner?
Verify that the bulb is just not positioned downstream of a P entice on the suction line. Relocate the bulb if that is discovered. It may be useful to insulate the bulb to make sure it isn’t affected by an air stream.
How is Refrigerant distribution?
On programs with distributors, it isn’t unusual to have completely different circuits with largely differing hundreds. This may end up in some circuits sometimes overfeeding sufficiently to permit liquid to succeed in the bulb. This will drive the TXV closed till superheat is once more achieved; at which period it would open. Correcting this requires the elimination of the distribution drawback.
How to adjust superheat on txv?
TXV has its superheat set on the manufacturing unit to function accurately on most programs. On occasions, nonetheless, the manufacturing unit setting might be adjusted. In most circumstances, growing the superheat will reduce looking. Turning the adjustment screw clockwise will improve the superheat.
Read also:
- How to install air conditioner condenser?
- How to remove air conditioner?
- Air conditioner capacitor what does it do?
- What is a split system air conditioner?
- What is an air handler on an air conditioner?
- How to install a wall air conditioner?
- The ultimate guide to air conditioner troubleshooting
- How to clean air conditioner?
What Size of A.C. or Heat Pump?
| Kit P/N | Size of A.C. or Heat Pump | |
| 920662 | 1.5 ton or 2 tons | |
| 920663 | 2.5 | |
| R22 REFRIGERANT | 920664 | 3 |
| 920665 | 3.5 | |
| 920666 | 4 | |
| 920667 | 5 | |
| 920668 | 1.5 ton or 2 tons | |
| 920669 | 2.5 | |
| 920670 | 3 | |
| R410A REFRIGERANT | 920671 | 3.5 |
| 920672 | 4 | |
| 920673 | 5 |
