
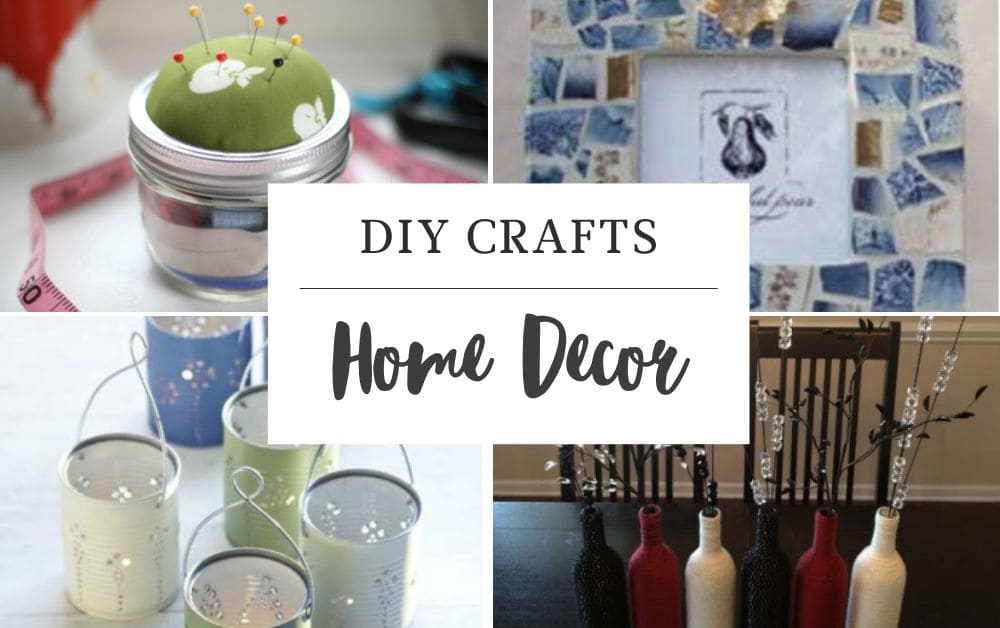
Are you looking for Finecraftguild DIY crafts home decor recipes beautifully recycled tutorials? Searching to make your home and rooms stunning with DIY crafts? Are you used to throwing trash? Don’t you have any ideas where to DIY craft home décor? If yes, you’re in the right place
In this article, we’ll show step-by-step how to DIY craft home décor, and also recycle the trash from trash to treasure, after reading this article you won’t throw your trash anymore.
If you have zero ideas on how to DIY Finecraftguild DIY crafts home decor recipes beautifully recycled this guide we’ll help you from zero to the hero, we’ll provide the materials to use and the instructions step-by-step, stay tuned
Without further ado let’s jump in!!
9 Best Finecraftguild DIY Crafts Home Decor Recipes Beautifully Recycled Tutorials
DIY #1. Tissue Paper Candle Votive
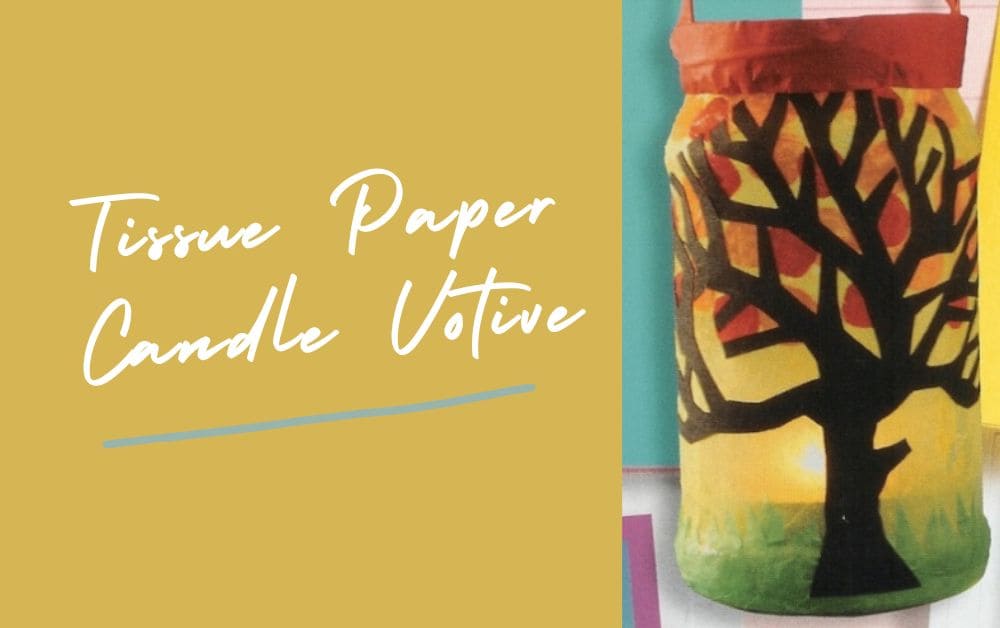
In this activity, we are going to turn empty jars into pretty glowing decorations. This project requires few materials but produces great results.
We will be creating a scene by cutting out shapes in different colors and types of paper and glue onto our glass jar.
This will be illuminated by the light of a candle that sits inside the jar. Please light with the supervision of an adult and be careful as the jars can get hot!
Materials and Tools:
• Glass jar
• Black paper
• Coloured tissue paper – yellow, green, red, and orange
• Scissors
• White glue
• Tea light candles
Instructions:
1. Coat the outside of a jar with white glue and wrap it in yellow tissue paper.
2. Cut a strip of spiky grass from green tissue and stick them around the base of the jar.
3. Cut red and orange circles in tissue paper and glue them around the top half of the jar.
4. Cut two trees out of black paper and stick them to the front and back of the jar so that they are opposite to each other.
5. Glue a strip of orange tissue to the lip of your jar to finish it off.
6. Place a tea light inside the jar and you are ready to light them!
DIY #2. Wrapped Bottle
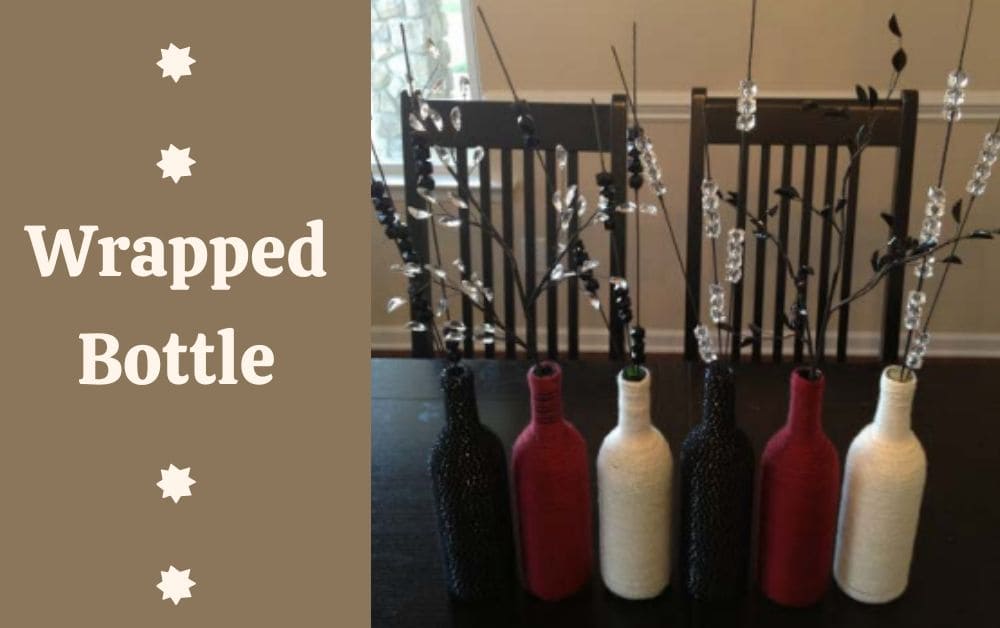
Most people have a lot of glass bottles in their recycling bins that can be repurposed. In this activity, we will wrap glass bottles with yarn or twine.
These can be used as vases or grouped as decorative features. A pair can be filled with sand and topped with cork for attractive bookends!
Hints and Tips
• Start wrapping your bottle at the top. This allows you to keep better tension as the bottle increases in girth. It is hard to get good tension if you go from the larger part of the bottle to the neck.
• Start wrapping your bottle either at the very top or just below the lip. The choice is yours.
• To create a smooth clean finish, carefully wind the yarn with each layer right next to the one before it. For a less symmetric, more organic look, let your yarn overlap and bunch up in various directions.
• Although fine yarn creates a very clean and smooth finish, it is difficult to work with your first time. For your first project, use a heavy four-ply yarn, or even jute on a small bottle.
Materials and Tools:
• Glass bottle
• Yarn or twine
• Clear tape
• White glue
• Scissors
Instructions:
1. Starting at the top of your bottle, tape the end of your yarn to the top of the bottle so that it is pointing down.
2. Apply a thin layer of glue to the top end of the bottle to hold the yarn in place, and then start wrapping. As you wrap, you will hide the end.
3. Apply another thin layer of glue and continue wrapping. Try to wind each layer of yarn, close to the other, without any room in between. Try playing with different tensions to see what works best.
4. When you get to the curve, you may need to ease up slightly on the tension. You may need slightly more glue to hold the yarn in place as the bottle curves outward.
5. Continue down the bottle until you are about 1 cm (0.4 inches) from the bottom.
6. Now turn the bottle over so it is upside down, add more glue and finish wrapping.
7. Once the glue has been set, trim the end. Use your bottle to decorate your room or hold flowers.
DIY #3. Magnetic Memo Board

In this activity, we will be repurposing a metal tray into a magnetic memo board by decorating it with paper and adding a ribbon hanger. Then, in the following activity, we will be making magnets for our new board.
The metal tray can be a cookie sheet or a serving tray. Before you start, make sure that a magnet will stick to it. If you want to paint it, choose a metal tray that does not have a Teflon coat.
You might want to coordinate your paint with the paper that you will be using. Reuse paper if you can. Depending on what kind of tray you use, you may want to tie the ribbon in a simple loop, or for a more ornate tray, tie it like a large bow.
Materials and Tools:
• Metal tray
• Spray paint (optional)
• Decorative paper – scrapbook or gift wrap
• Scissors
• White glue or découpage medium
• Industrial glue – E-6000
• Ribbon – 100 cm (40 inches) of 3.5 cm (1-1/2 inch)
Instructions:
1. If you like, paint edges and sides with the craft paint of your choice. Allow drying.
2. Cut paper to fit in the flat part of the pan.
3. Apply white glue or découpage medium to the back of the paper and fix it to the tray. Apply pressure from the center outward to the edges to remove any air bubbles. Let dry.
4. Apply a coat of découpage medium onto the top of the paper. Let dry.
5. With your ribbon, make either a simple loop or tie a lovely bow, leaving at least 15 cm (6 inches) at the ends.
6. Turn the tray over and glue two ends of the ribbon to the back of the tray with E-6000.
7. Turn over and violà – a magnetic memo board!
DIY #4. Sewing Kit in Mason Jar
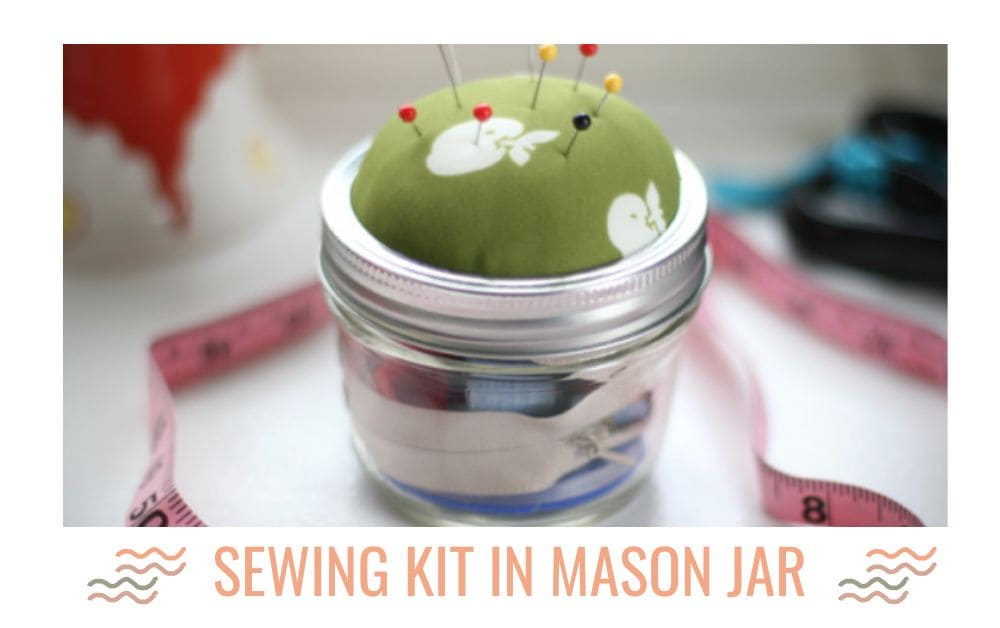
In this activity, we will be creating a sewing kit out of a mason jar. By using stuffing and fabric, we will transform the lid into a pincushion and then use the jar itself to store thread, needles, buttons, and mini scissors.
It is handy to have for your crafts or to give as a gift. You can use any size jar but it needs to be a mason jar. That is a jar that has a metal screw band top with a glass or metal lid that seals onto the jar.
Materials and Tools:
• Mason jar
• Fabric
• Pencil
• Scissors
• Fiberfill
• Hot glue and hot glue gun, or fabric glue
• Sewing kit materials like assorted needles, thread, and mini scissors to fill the jar.
Instructions:
1. Using the metal or glass lid of the mason jar, draw a circle onto the fabric about 2.5 cm (1 inch) wider than the jar lid. Cut out the circle.
2. Turn the fabric circle right side down and place the lid bottom upside down onto the middle of the fabric. With your glue gun or fabric glue, place a line of glue along three-quarters of the outer rim of the lid.
3. Fold the fabric onto the glue, bunching as you go until you reach the unglued part. Let dry well.
4. Stuff batting inside the top of the lid to make a pin cushion. Add batting until it is poufy and even.
5. Glue the last section of the fabric to the lid.
6. Add a line of glue along the inside of the metal screw band.
7. Press the pin cushion lid inside the screw band and let it dry.
8. Fill the inside of the jar with sewing essentials such as pins, string, white and black thread, zipper, and mini scissors. Then screw the lid on top – it will be harder to screw on with the fabric but should still fit.
9. Ta-dah, a sewing kit in a jar!
DIY #5. Tin Can Luminaries
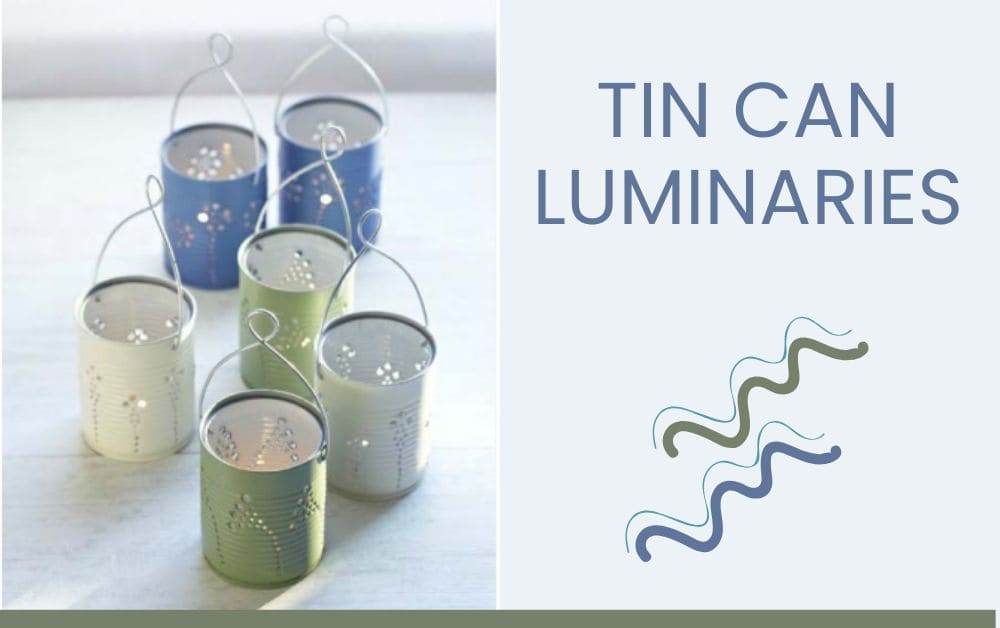
Here is an attractive way to repurpose tin cans into simple lanterns or luminaries. By punching holes, we are going to create a design that the light of a candle will shine through.
We will also add a wire handle, so your lantern can be hung from a tree or a hanger. In choosing a design for your luminary, select or draw a simple pattern.
Detail is difficult to both show and does with this technique, so simple is better. A coloring book is a good source of simple designs.
Keep in mind that the gap between holes needs to be at least as large as the diameter of each hole.
Materials and Tools:
• Tin cans – 2 or 3
• Sand
• Water
• Freezer
• Paper pattern
•Duct tape
• Hammer
• Nail
• Towel or soft cloth
• Spray paint (optional)
• Newspaper (optional)
• Wire – 1.2 to 2 mm (12 to 16 gauge); 25 cm (10 inches)
• Pliers
• Wire cutters
Instructions:
1. Remove the label and any blobs of glue from the can.
2. Pack the can with sand, top it up with water, and freeze overnight or until solid.
3. Draw or trace a design on a piece of paper to fit the size of the can.
4. Using duct tape, secure your design in place on the frozen can. Be warned that the paper gets wet and tears easily.
5. Lay the can on a stable surface on a towel or soft cloth.
6. Using a hammer and nails, punch holes through your pattern in the can. After 10 minutes of working on your can, return it to the freezer for about 30 minutes to ensure the can remains solid. If you are making several lanterns, work on them in rotation.
7. Once your design is complete, punch a pair of holes opposite each other about 1 cm (3/8 inch) below the top of the can for the handle.
8. Remove the sand, water, and any ice that is left.
9. If you want, fill the can with newspaper and spray-paint it evenly. Make sure you work in a well-ventilated area or outside. Let dry.
10. To attach the handle, take a 25 cm (10 inches) length of wire, and push each end through the holes just below the top of the can. Bend each end of the wire to secure it to the can.
11. The lantern is now ready to place a candle in it. Several groups make a lovely night-time light!
DIY #6. Snow Globe
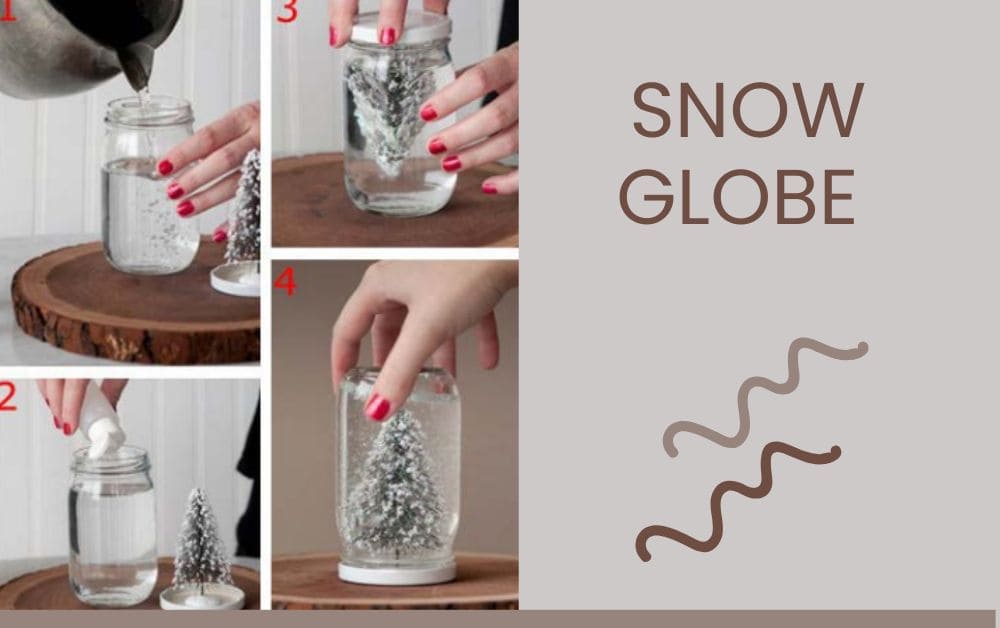
Snow globes are a classic Christmas decoration and fun to have. It can be mesmerizing to watch the little specks of snowfall in the enclosed, magical Christmas wonderland.
In this activity, we will create a winter wonderland in a jar.
We will be filling a wide-mouth jar that has a tight-fitting lid with distilled water, glycerin and glitter. A pickle, salsa, or jelly jar will work well.
You can paint the lid if you want to cover up the brand or change the color.
Materials and Tools:
• Glass container with a tight-fitting lid
• Sandpaper
• Measuring cup
• Little figurine
• Distilled water
• Liquid glycerin
• Glitter
• Clear epoxy cement or waterproof glue like Silicon II or E-6000
• Spray paint (optional)
Instructions:
1. Make sure your jar is clean and all the labels have been removed.
2. Measure the liquid you will need to fill your jar. One way to do this is to fill up your jar with tap water and then pour that water into a measuring cup
3. At the same time, test your jar for the watertight lid. Do this by putting water in the jar, putting the lid on tightly, and then turning it upside down to see if it leaks.
4. Clean and dry your jars.
5. Paint the lid of your jar (optional).
6. Sand the inside of the lid until the surface is slightly rough. With clear-drying epoxy (or other waterproof glue), adhere the figurine to the inside of the lid. Let dry.
7. Calculate the amount of glycerin you will need – use 5 ml (1 tsp) of glycerin for every 250 ml (1 cup) of water.
8. Add the appropriate quantities of glycerin and distilled water.
9. Add a pinch of glitter. Too much glitter will stick to the bottom of the jar when you flip it over. You can add more later.
10. Screw the lid on firmly, give it a good shake and watch the snowfall.
11. At this stage, you can adjust the amount of glycerin or glitter. If you find the water too thick and chunky, reduce the amount of glycerin.
- Once you are satisfied with your scene, you can glue on your lid – dry your lid put a thin strand of glue on the inside of the lid, and screw it onto the jar. Let dry before shaking.
12. Congratulations! You have just made a homemade snow globe!
DIY #7. Pop Bottle Flowers
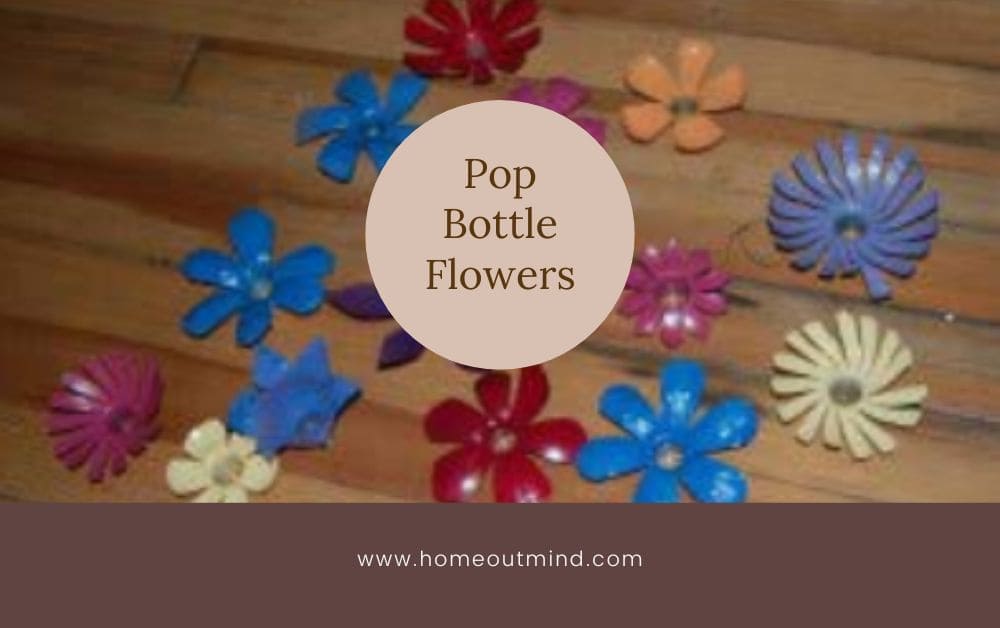
Have you noticed that the bottom of a pop bottle had lobs that resemble flowers? We are going to use these and the tops of pop bottles to create flowers.
Each bottle has a unique shape and texture that will lend itself to differing flower designs. Have fun experimenting with different bottles to get various designs.
Materials and Tools:
• Plastic pop bottles
• Scissors
• Spray paint (optional)
• Hole punch, or heavy needle
• Clear fishing line
Instructions:
1. Rinse your bottles with water to make sure they are clean and remove as much of the label as you can. Make sure to hang onto your bottle cap.
2. With the points of a pair of scissors, cut your bottle into three parts – the bottom, the middle, and the top. The length you cut your top will determine how long your petals are. Save the middle piece for the next activity.
Using the Bottom:
1. For daisy-like flowers, take the bottom of your bottle and use your scissors to cut closer to the lobes defining the petals.
2. Paint if desired.
3. Use these to make a ‘daisy chain’ that you can use to decorate your bedroom. Punch a hole in one of the petals.
Then thread fishing line through the hole and secure with a knot, thread on another flower until you have a strand, or chain, of flowers.
Using the Top:
1. To make flowers from the top of your bottle, determine the number of petals you would like to have. You can have as few as 4 or 5 or as many as 15-16.
2. Using your scissors, make cuts from the open end of the bottle to the neck.
3. Once you have cut all your petals, shape them by rounding corners adding points, or cutting them in whatever shape your heart desires.
4. Pull back on each petal and flip them inside out. Crease each petal at its base.
5. Paint the inside of the flowers if desired. Let the flowers dry for about 30 minutes. You can use multiple colors of spray paint for a multi-color effect or add embellishments with markers or acrylic paint.
6. To attach your flowers, drill a hole in the cap of the soda bottle. Use a thumbtack, screw, or nail to secure the bottle cap to your wall, door, shed, or art project. Then screw on the flower to create a flower festival!
DIY #8. Simple Sewing
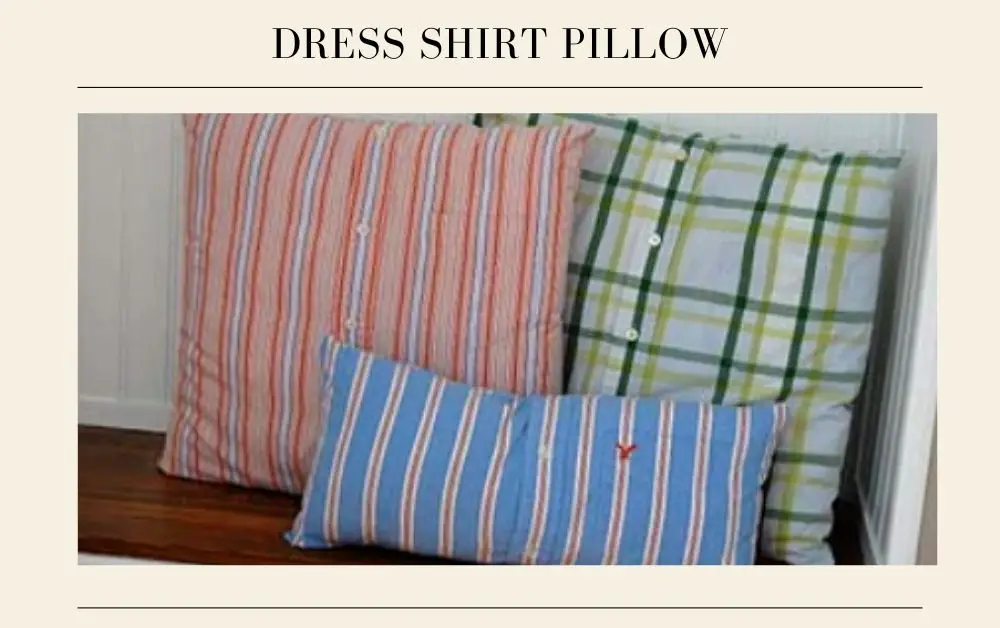
In this activity, we are moving from T-shirts to men’s dress shirts. These shirts are generally made of lightweight cotton, which makes great pillow shams to add a decorative accent to your room. This is a straightforward sewing project.
Since we are using a button-up shirt, we do not have to create an opening to get the pillow in and out – it is already built in! Just sew, then unbutton the shirt buttons, turn the cover right side out and use your finger to poke out the corners a bit. Insert your pillow form, and then just button it up!
Materials and Tools:
• Dress shirt
• Pressing iron
• Pillow form
• Measuring tape
• Paper
• Pins
• Scissors
• Pencil or chalk
• Sewing machine or sewing needle and thread
Instructions:
1. Press your shirt, being careful with the hot iron.
2. Lay your pressed shirt flat with the buttoned side up on your working surface. Once flat, pin the front to the back to hold the back and front together and in place.
3. With your measuring tape, measure your pillow form. Add 2.5 cm (1 inch) to the width and length measurements.
4. Using your pencil or chalk, transfer your measurements to your paper and cut it out to make a pattern. Cut a slit in the pattern right down the middle, 2.5 cm to 5 cm (1 to 2 inches) from each end.
5. Place your pattern on your shirt. Poke the buttons of the shirt through the slit. Move the pattern up and down until the buttons are centered. Make sure that the pocket, if any, is either in or out of your design. Pin to secure the pattern to the shirt.
6. Cut through both layers of the shirt all around the pattern.
7. Put the right sides of your two pieces together. Pin the corners and sides to keep the pieces in place.
8. Using a sewing machine or needle and thread, make a 1.2 cm (1/2 inch) seam around all the edges. If you are sewing by hand, make your stitches quite small to make your pillow sham strong.
9. Snip the corners on an angle so the fabric does not bunch up.
10. Unbutton, push out the corners, insert your pillow form, and rebutton. A beautiful pillow!
DIY #9. Mosaic Frame
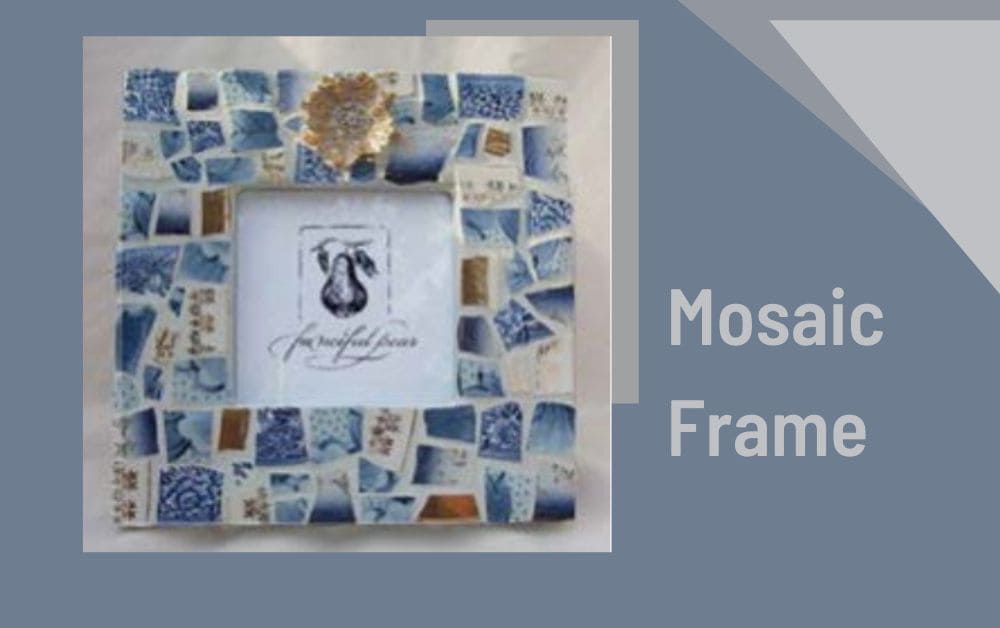
In this activity, we are going to apply broken bits of tile and dishes to a frame to make a lovely surround for a treasured photograph or picture.
Many people have chipped china that they have been keeping. Give them a hand and put them to good use.
Old tiles can provide contrast to the china pattern and expand the surface area you can cover, particularly if you have limited amounts of china or dishes. See if you can find an old frame to suit your purpose and make this a truly upcycled project.
Hints and Tips
• Making mosaics is messy so protect your work surface and be sure to wear old clothes!
• If you are re-using a frame that has been painted or varnished, strip it with paint thinner or another product. Be sure to follow the safety instructions, and have good ventilation and safety protective clothing.
• If you are going to make a design, work it out on paper first.
• If you get any glue on the top surface of the pieces, wipe it off with a damp cloth before it dries.
• If you are going to create a design rather than applying your pieces randomly, make your design bold and simple for the greatest effect. Start with outlines of each section and border choosing the appropriate shapes.
• In mosaics, the gaps between the pieces are as much a part of the design as the pieces themselves. Different colored grout can affect your piece dramatically.
• For a contrasting grout color, mix acrylic paint or cement stain with the tile grout.
• When gluing your pieces onto your frame, make sure you have enough adhesive on them; when they are pressed onto the frame, glue should ooze out around them.
Materials and Tools:
• Plastic sheet
• Wood frame
• Craft knife
• White glue
• Water – less than 50 ml (1/4 cup)
• Tiles, china
• Safety goggles
• Nose and mouth mask
• Heavy gloves
• Hammer or tile nippers (optional)
• Heavy towel
• Waterproof tile adhesive
• Grout and container to mix if using powder
• Rubber or latex gloves
• Piece of cardboard 10 x 10 cm (4 x 4 inches)
• Cloths, rags, or sponge
• Sealant (optional)
• Paintbrush (optional)
Instructions:
1. Protect your working surface with a plastic sheet.
2. Lay your frame on a flat surface. Take a craft knife and score the surface of the frame. This will give the frame some ‘tooth’ and improves the grip between the tiles and the adhesive.
3. Wipe down the frame, and seal it with diluted white glue. Mix 1 part white glue to 3 parts water and apply it evenly to the surface of your frame with a paintbrush. Let dry.
4. While your frame is drying, move to an area where you can break your tiles and china. Outside or in a garage are good places.
5. Put on your safety glasses and mask. Cover your china and tiles with a heavy towel and smash with a hammer. You may need to hit some pieces repeatedly to get them to break. Or, you can use your tile nippers to make your pieces.
6. Organize your pieces by color and design.
7. Apply tile adhesive to the back of your tile or china with either a small brush or dipping your piece into the adhesive. Place it on your frame as close as possible to the other pieces.
8. Wipe off any excess adhesive and let dry overnight.
9. Once your tile adhesive is dry, scrape away excess adhesive that has squeezed out from under your pieces.
10. If you are using powdered grout, mix the grout powder with water according to the manufacturer’s directions in a clean old bowl or container.
11. Wearing rubber or latex gloves and using the 10 cm x 10 cm (4 x 4 inches) piece of cardboard, apply and spread the grout on your frame. Push the paste into the gaps with your fingers and smooth it evenly over the whole surface.
- Do not put too much on; you want to use enough to get into the spaces and to make a light layer on the tiles.
12. Wipe off any excess grout with a damp cloth; the tiles do not have to be clean but they should not have a lot left on. Let dry for 10 minutes.
13. Wipe again with a damp cloth; if there is still a lot of grout, scrub the surface with a stiff nailbrush to remove the excess. It should come away as a powder.
14. Let dry for 24 hours.
15. Polish with a soft dry cloth. 16. Seal if you wish and add a favorite photo or picture.
Final verdict
After reading our guide Finecraftguild DIY Crafts Home Decor Recipes Beautifully Recycled Tutorials you will no longer throw your trash anymore, you will recycle that trash into crafts and decorations which will décor your home or your garden,
Reading our guide means that you hitting two birds with one stone, so you going to save the environment by recycling trash to craft, as well as décor your home with no costs
FAQs
What are some projects that nobody should try to DIY?
Muffler/exhaust repair. Unless you are a welder with a hydraulic lift. Leave that one to the shop. Rust in your eyes, wrestling with burned nuts and bolts, scrambling from one end of the car to another on your back, yecchh.
I knew a guy who had mad plumbing skills but would only work on new buildings. I’ll tackle some crud to repair my plumbing but never touch an exhaust system.
What are recycled materials made to?
They are made of recycled materials. these can be any material, as all materials can be technically recycled, although many cannot be economically recycled.
recycle – glass, aluminum, concrete, bricks, timber, plastics, all metals, paper, electronics, batteries.
all can be recycled but some processes use more energy in recycling than in making from virgin material. If the cost of energy is reduced then more materials can be recycled
How can recycled materials be repurposed and recycled from landfills?
Before landfills, we had nearby garbage dumps where the local garbage collectors dumped their loads. Landfills are garbage dumps that are much farther away and much bigger.
The main difference is the garbage is spread out, crushed, covered with soil, and compacted. All you see is a lot of dirt spread out over miles of land.
Landfilling garbage is about as unsustainable as anything can get; garbage and the soil to bury it are hauled hundreds of miles by rail, semi-trailers, and trailers. Then the garbage is spread out, crushed, and covered with soil (about two feet, I think).
Finally the empty garbage hauling equipment is hauled back for more garbage and soil. All of this is done using huge diesel-powered equipment spewing tons of carbon dioxide into the air.
Read also:
- 10 Best Ideas For Bedroom With Chaise Lounge – Master & Small Bedroom
- 10 Garys Basement Bathroom Retreat Ideas & Tips
- 12 Small Rustic Bathroom Ideas On A Budget
- 12 Dessert Table Ideas On A Budget – Ideas, Tips, DIY
- Kitchen Island With Sink And Dishwasher – 4 Reasons & Considerations For Having Them In Island Kitchen
