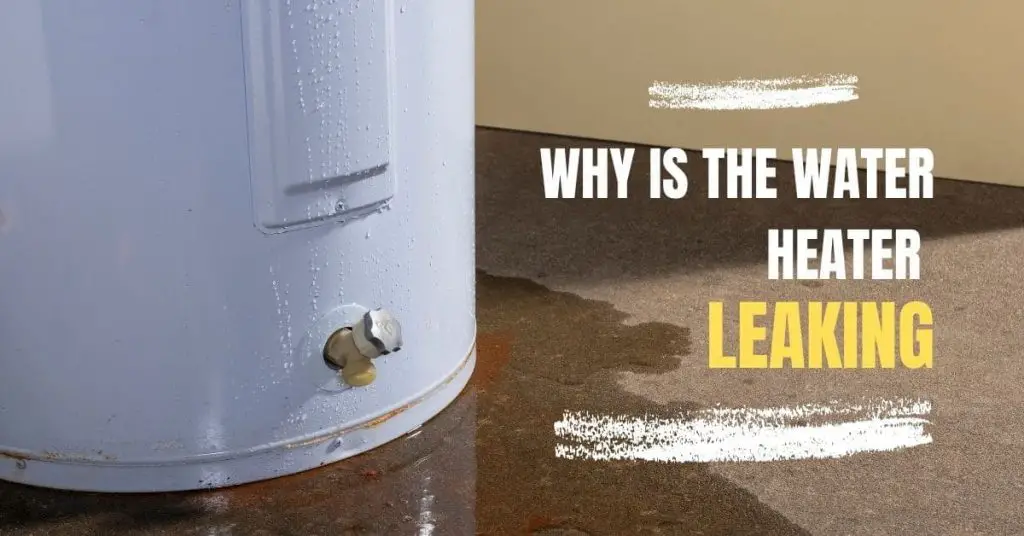
Are you troubled by a leaking water heater tank and unsure of how to tackle the issue? Before considering costly replacements or professional help
Let’s uncover the common causes behind water heater leaks and discover simple solutions to address them. Follow our guide to troubleshoot and fix your water heater effectively.

Why is the water heater leaking and how to fix it?
Cause 1: No Hot Water
If your electric water heater isn’t producing hot water, several common issues may be at play:
1. Lack of Electric Power: This is often a problem with new installations or electrical wiring.
2. Burned-Out Upper Heating Element: Common in new installations, this can result in no hot water.
3. Tripped Energy Cut Off (ECO): The red button on the upper thermostat can trip, cutting off power.
4. Reversed Inlet and Outlet Connections: Typically found in new installations.
5. Faulty Upper Thermostat or Wiring: This can lead to no hot water.
6. Excessive Hot Water Leak: A leak in the plumbing system can exceed the water heater’s capacity, making it seem like there’s no hot water.
Solution: Follow these steps to diagnose and resolve electrical issues:
1. Check Electric Power:
- Turn off the water heater’s circuit breaker or remove fuses.
- Locate and inspect the electrical junction box on top of the water heater.
- Test for electrical power using a non-contact circuit tester.
- If there’s no power, contact a professional to inspect your home’s wiring or circuit breakers.
2. Inspect Upper Heating Element:
- Turn off power and remove the upper access panel.
- Remove insulation to access the upper thermostat and heating element.
- Check for power and measure resistance with a multimeter.
- If the element is burned out, replace it. Otherwise, ensure clean, tight connections.
3. Check/Reset Energy Cut Off (ECO) Button:
- Turn off power to the water heater.
- Press the red ECO reset button to reset it.
- Listen for a click to indicate a tripped ECO.
- If tripped, investigate and repair the cause of overheating before restoring power.
Cause 2: Insufficient Hot Water or Slow Hot Water Recovery
If your hot water isn’t reaching the desired temperature or if you’re experiencing slow hot water recovery, several factors could be at play:
1. Faulty Thermostatic Mixing Valve: Check for defective mixing valves in faucets or shower controls, as they can reduce hot water output even when the tank has sufficient hot water.
2. Low Thermostat Settings: Ensure that the thermostats on your water heater are not set too low, impacting the temperature of the water.
3. Undersized Water Heater: If your water heater isn’t meeting your hot water demands, consider upgrading to a larger model or implementing measures to reduce hot water usage.
4. Reversed Plumbing Connections or Melted Dip Tube: Verify that your plumbing connections are correct and check for signs of a melted dip tube, which can occur soon after a new installation.
5. Plumbing Leaks: Even minor leaks in your home’s plumbing system can affect hot water production. Locate and repair any leaks promptly.
6. Faulty Lower Heating Element: If the lower heating element or thermostat is malfunctioning, you may experience reduced hot water output. Replace the lower element or thermostat if necessary.
Solution:
1. Check Thermostatic Mixing Valves: Ensure faucets and shower controls are functioning properly. If needed, replace defective mixing valves.
2. Adjust Thermostat Settings: Increase thermostat settings if the water temperature is consistently too low.
3. Consider Water Heater Replacement: If your current water heater is insufficient, upgrade to a larger model or implement water-saving measures.
4. Verify Plumbing Connections: Confirm correct plumbing connections and replace a melted dip tube if necessary.
5. Address Plumbing Leaks: Locate and repair any leaks in your home’s plumbing system to optimize hot water production.
6. Replace Faulty Components: If the lower heating element or thermostat is defective, replace them to restore hot water output.
Cause 3: Temperature Too High
If your water heater is producing water at excessively high temperatures, it can pose safety risks and indicate underlying issues. Here’s how to address it:
Solution:
1. Install or Adjust Thermostatic Mixing Valves: Follow manufacturer instructions to install or adjust thermostatic mixing valves at each point of use to regulate water temperature.
2. Adjust Thermostat Settings: Ensure thermostat(s) on the water heater are set to appropriate levels. If temperatures remain too high:
- Check for a malfunctioning thermostat or shorted heating element, which can cause overheating.
- If the Temperature and Pressure Relief Valve (T&P Valve) releases large amounts of very hot water, it may indicate a shorted heating element or malfunctioning thermostat. Turn off power until the issue is resolved.
- High water temperatures can trip the Energy Cut Off (ECO). Address this issue promptly to prevent further problems.
Cause 4: Low Water Pressure
If you’re experiencing low water pressure, particularly on the hot water side, follow these steps:
1. Check for Melted Heat Traps or Dip Tubes: Soldering copper pipes while connected to the water heater can cause heat traps or dip tubes to melt, restricting hot water flow. Replace any damaged heat traps or dip tubes.
2. Ensure Supply Valve Is Fully Open: If the water heater’s supply valve is partially closed, it can lead to reduced water pressure. Open the supply valve fully to restore proper pressure.
Cause 5: Drips from T&P Relief Valve Discharge Pipe
Address drips from the Temperature and Pressure (T&P) Relief Valve discharge pipe as follows:
- Small Amount of Dripping: High home water pressure may be the cause. Consider installing a properly sized and pressurized Thermal Expansion Tank to regulate pressure.
- Large Amount of Hot Water Discharge: This may indicate tank overheating, necessitating immediate attention to prevent further damage.
Solve:
1. High Water Pressure: If the T&P Relief Valve drips due to high water pressure, take these steps:
- Install a Pressure Reducing Valve (PRV) on the main cold water supply line.
- Adjust the PRV to maintain pressure between 50 and 60 psi.
2. Thermal Expansion Tank: Consider installing or checking the Thermal Expansion Tank:
- Install a Thermal Expansion Tank to regulate pressure fluctuations.
- Ensure the tank is pressurized correctly according to manufacturer guidelines.
- If the T&P Relief Valve continues to drip despite the presence of a Thermal Expansion Tank, check for defects in the tank’s internal bladder. Refer to manufacturer instructions for troubleshooting.
3. Debris: If debris obstructs the T&P Relief Valve, causing dripping:
- Attempt to clear debris by manually operating the valve.
- Allow small amounts of water to flush out any obstructions.
- Follow instructions provided on the T&P Relief Valve label.
If the above measures fail to resolve the issue and the T&P Relief Valve continues to drip:
- Have a qualified professional replace the T&P relief valve to ensure proper functioning.
4. Water Odor:
- Address “rotten egg” odor caused by harmless bacteria in tap water:
- Chlorinate the system to eliminate odor-causing bacteria.
- Consider replacing the standard anode rod in your water heater with a special zinc anode rod, which may help reduce or eliminate odor.
Can I still use the water heater if it is leaking?
Using a leaking water heater is not recommended due to several potential risks it poses.
Leaks can indicate underlying issues such as corrosion, cracks, or faulty components, which could lead to further damage to the tank or surrounding areas.
Continuing to use a leaking water heater may exacerbate the problem, potentially causing water damage to your property, electrical hazards, or even the risk of scalding if hot water leaks are involved.
Therefore, it is best to turn off the water heater and refrain from using it until the leak has been properly addressed and repaired by a qualified professional.
Should I turn off the water heater if it’s leaking?
Yes, it is essential to turn off the water heater if you notice any signs of leaking. Turning off the water heater helps prevent the leak from worsening and causing more extensive damage.
Additionally, shutting off the water heater reduces the risk of electrical hazards, particularly if the leak is near electrical components of the heater.
By turning off the water heater promptly, you can mitigate potential risks, conserve water, and prevent further damage to your property until the leak can be investigated and repaired by a licensed plumber or technician.
Is a leaking water heater dangerous?
A leaking water heater can pose various risks and potential hazards that should not be overlooked.
Depending on the severity of the leak and its location, a leaking water heater can lead to water damage to floors, walls, and belongings, which may require costly repairs. Moreover, if the leak involves hot water, there is a risk of scalding, especially if the water comes into contact with individuals or electrical components.
Additionally, leaks near electrical connections or gas lines can pose fire or explosion hazards. Therefore, it is crucial to address a leaking water heater promptly and seek professional assistance to assess and resolve the issue to ensure the safety of your home and occupants.
Can you still use water if the water heater is leaking?
It is not advisable to continue using water if your water heater is leaking. Using water while a leak is present can exacerbate the problem, causing further damage and potentially increasing safety risks. Additionally, using a leaking water heater may lead to water wastage and higher utility bills.
Therefore, it is recommended to turn off the water heater and refrain from using it until the leak has been properly diagnosed and repaired by a qualified technician.
Taking prompt action to address the leak will help prevent further damage to your property and ensure the continued safe operation of your water heater.
Frequently asked Questions
How to light a gas water heater
Lighting a gas water heater is a straightforward process. Start by turning the control knob to the “Pilot” position and holding it down.
While holding the knob, press the igniter button to ignite the pilot light. Once lit, continue holding the knob for about 30 seconds to allow the thermocouple to heat up. Afterward, release the knob and set the temperature to your desired level.
For detailed instructions and safety precautions, refer to our comprehensive guide on How to Light a Gas Water Heater.
How to fix RV water heater
Fixing an RV water heater requires troubleshooting and attention to detail. Start by checking for common issues such as gas supply, burner assembly, and ignition system. Inspect for leaks and ensure proper ventilation.
Clean or replace components as needed, and follow manufacturer guidelines for maintenance. For step-by-step instructions and troubleshooting tips, explore our article on How to Fix an RV Water Heater.
How do you turn on an electric water heater
Turning on an electric water heater is a simple process. Locate the circuit breaker or fuse box in your home and ensure the breaker or fuse corresponding to the water heater is in the “on” position.
This step provides power to the water heater’s heating elements. For detailed instructions and safety precautions, refer to our comprehensive guide on How to Turn On an Electric Water Heater.
How to clean tankless water heater
Regular cleaning is essential to maintain the efficiency of a tankless water heater. Start by turning off the power and water supply to the unit.
Remove any debris or mineral buildup from the inlet filter and flush the system with vinegar or a descaling solution to remove scale deposits.
Rinse thoroughly and reinstall the filter. For detailed cleaning instructions and maintenance tips, refer to our comprehensive guide on How to Clean a Tankless Water Heater.
How to replace thermocouple on water heater
Replacing a faulty thermocouple is necessary if your water heater’s pilot light won’t stay lit. Start by turning off the gas supply and pilot light.
Remove the old thermocouple from the control valve and install the new one, ensuring it’s securely attached.
Relight the pilot light according to manufacturer instructions. For detailed replacement steps and troubleshooting tips, explore our article on How to Replace a Thermocouple on a Water Heater.
Final Thoughts
In conclusion, understanding why your water heater is leaking is crucial for prompt action and resolution. Whether it’s due to issues with pressure, faulty components, or other factors, addressing leaks promptly can prevent further damage and potential hazards.
By identifying the root cause and taking appropriate measures, such as turning off the water heater and seeking professional assistance, you can safeguard your property and ensure the continued efficiency and safety of your water heater system.


